
File Manager - How to Compress Files into an Archive (GZip)
This article is part of our File Manager tutorial series. Please see the links below if you are looking for a different explanation of the File Manager.
- Accessing the File Manager
- Navigating the File Manager
- Uploading Files
- Creating, Removing, and Editing Files
- Copying and Moving Files
- Compressing Files into an Archive (GZip)
- Extracting Files from an Archive
A compressed file (archive) is a file that contains several other files or folders which have been written in a format that takes up less space. This is helpful when you want to back files or folders up to a local machine. GZip is an application for compressing files on Linux systems. GZip is already implemented on our servers and will allow you to compress and extract files from the file manager. This is not the same as mod_gzip.
Compressing Files into an Archive using GZip
Note: Bluehost offers two account management interface options; our original 'Rock' control panel and 'Account Manager,' an updated control panel designed for simplicity. While management options are generally the same across interfaces, the location of certain settings may vary between the two. Please see Account Manager vs. Bluerock to determine which step to follow.
Account Manager
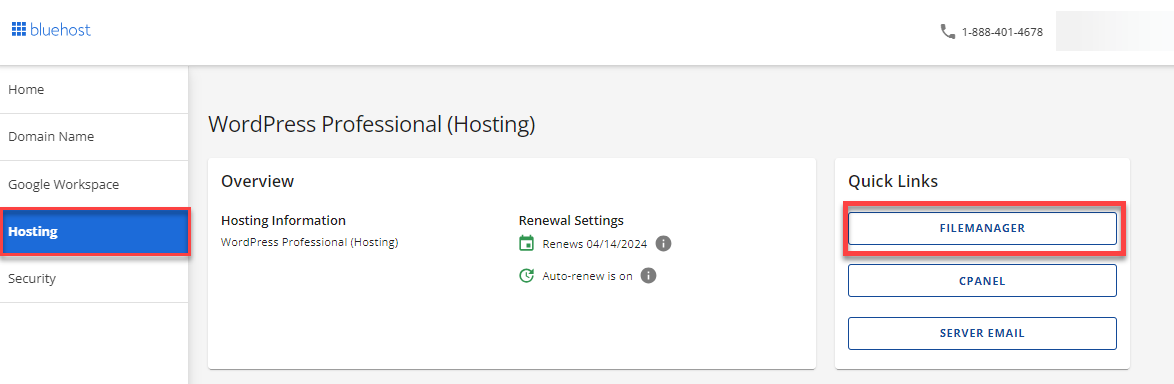
- Log in to your Bluehost control panel.
- Click on the Hosting tab in the side navigation menu on the left, and then click on File Manager.
Bluerock
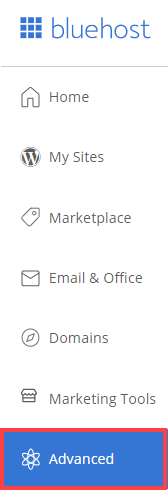
- Log in to your Bluehost control panel.
- Click on the Advanced tab from the side navigation menu to the left.
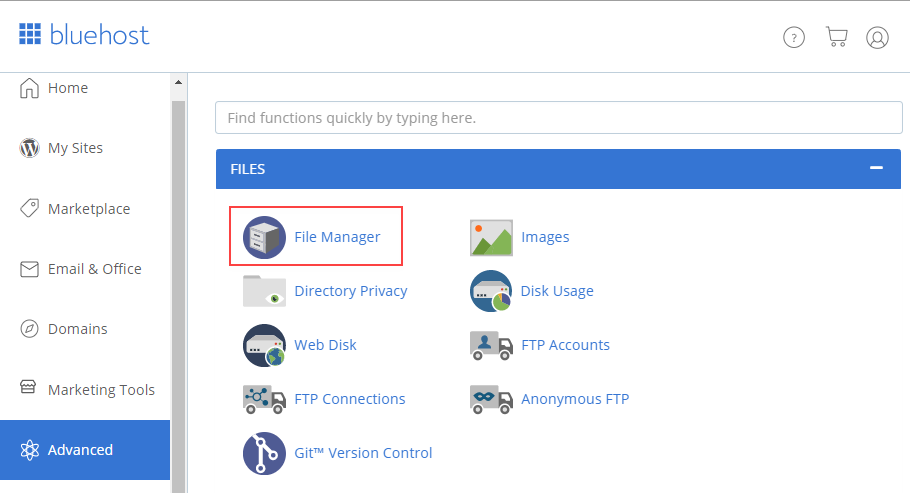
- Locate the File Manager under the Files section.
Once you're in cPanel:
- Navigate to the folder which contains the files or folders you want to compress.
- Select the files or folders you want to compress.
- Hold control to select multiple items or hold shift to select a group of items.
- With the appropriate files and folders selected (usually highlighted in blue), click the Compress icon from the top-left toolbar.
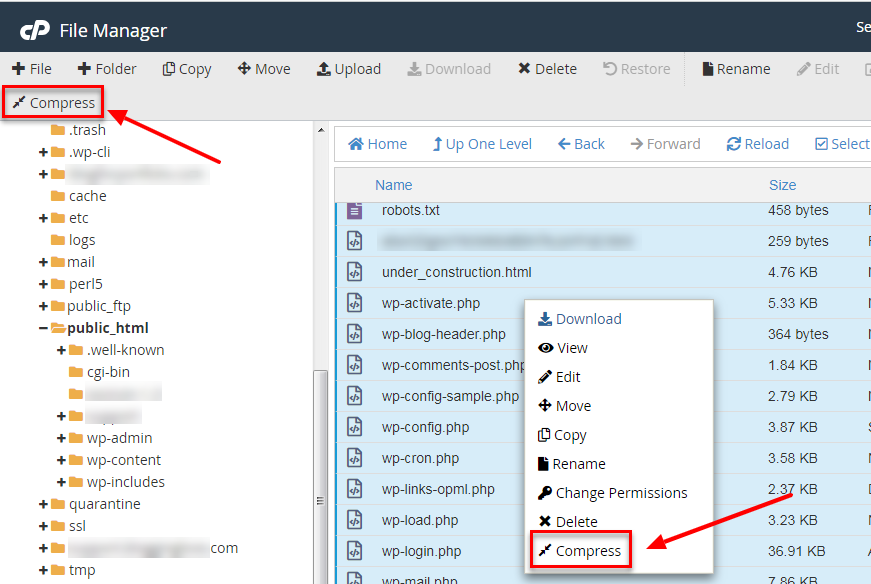
- Alternatively, you can right-click on the selected files and click on Compress from the drop-down menu as pictured above.
- A dialogue box will appear asking which compress type you prefer.

- After choosing your preferred compression, scroll down, and you will see a field indicating the location path of the file. It's better if you keep the file in the public_html directory but change the file name. (The word after the last forward slash /.)
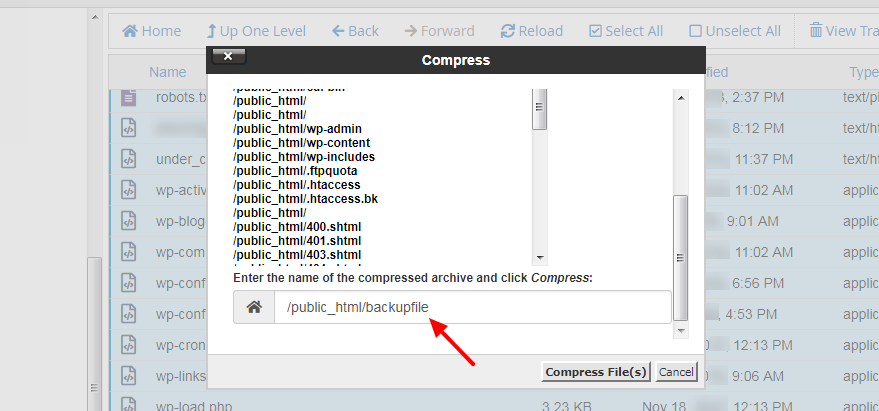
- Click the Compress File(s) button.
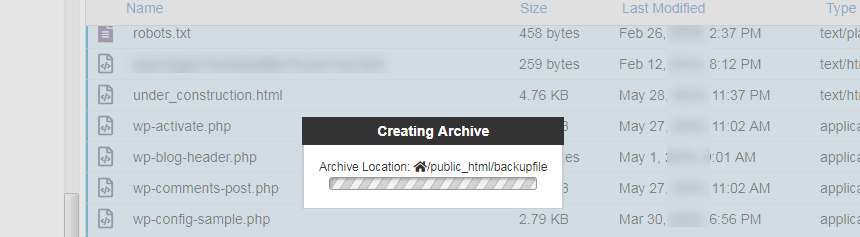
- This is what you will see while the compression is in progress.
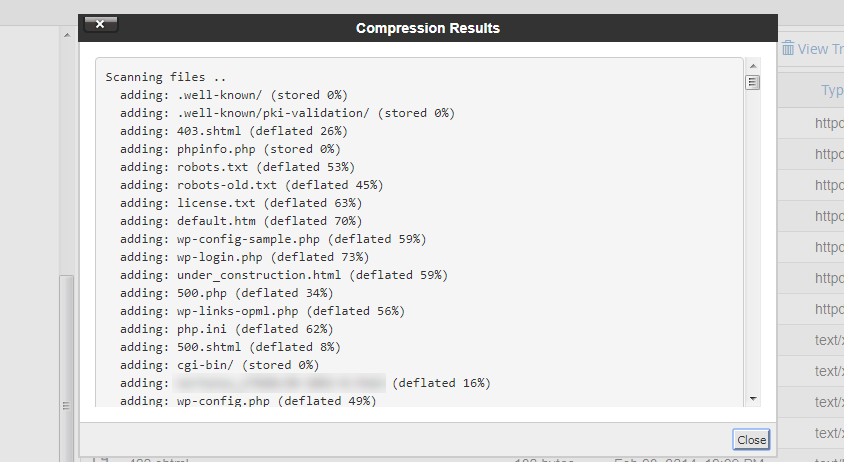
- And here's what it will look like once done.
Note: We recommend using GZip as it has the best data compression ratio and compression times.
You will now have a GZip(.gz), Zip(.zip), or Bzip2(.bz2) compressed file of the items you selected. For more information on how to extract this or other compressed files, please see our Extracting Files from an Archive article.
Important: For more information on compressing and extracting files through CLI (Command-Line Interface) instead of the File Manager, please see our Compress/Decompress files via CLI (Command-Line Interface) article.
If you need further assistance, feel free to contact us via Chat or Phone:
- Chat Support - While on our website, you should see a CHAT bubble in the bottom right-hand corner of the page. Click anywhere on the bubble to begin a chat session.
- Phone Support -
- US: 888-401-4678
- International: +1 801-765-9400
You may also refer to our Knowledge Base articles to help answer common questions and guide you through various setup, configuration, and troubleshooting steps.