WordPress: How to Use our Page Caching Feature
When your site gets a large number of simultaneous visitors, the site could occasionally appear down due to the overwhelming number of PHP processes running on the server.
One way to increase performance is to enable page caching. Through your Bluehost portal and Bluehost plugin, we have a caching feature to help your site performance, which is automatically enabled for all WordPress installations.
How to Enable Caching Feature
You can enable page caching in 2 different ways:
- Using the 'Bluehost plugin' inside your WordPress dashboard, or
- By accessing 'My Sites' inside your Bluehost portal.
Using the Bluehost Plugin Inside WordPress Dashboard:
- Log in to your WordPress dashboard.
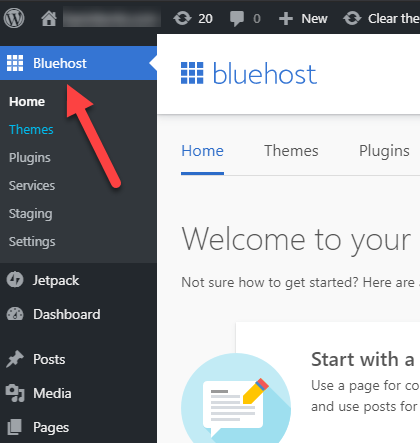
- Select Bluehost from the left-side menu and select Settings.
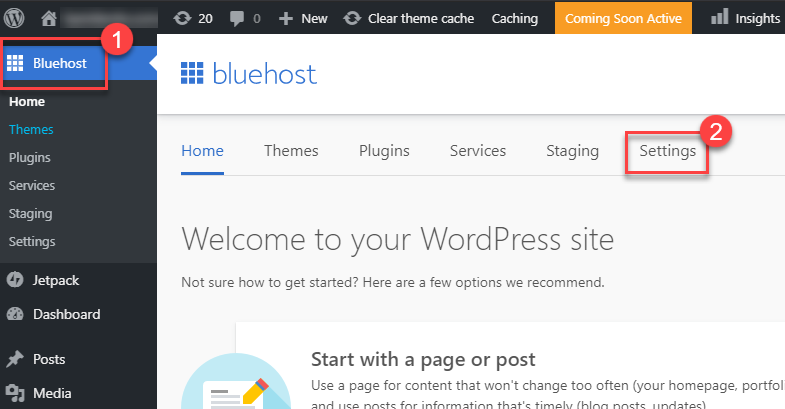
- Scroll down to the bottom until you see Performance.
- Alongside Caching, toggle the switch button to On.
- Under Caching Level, enable Assets & Web Pages.
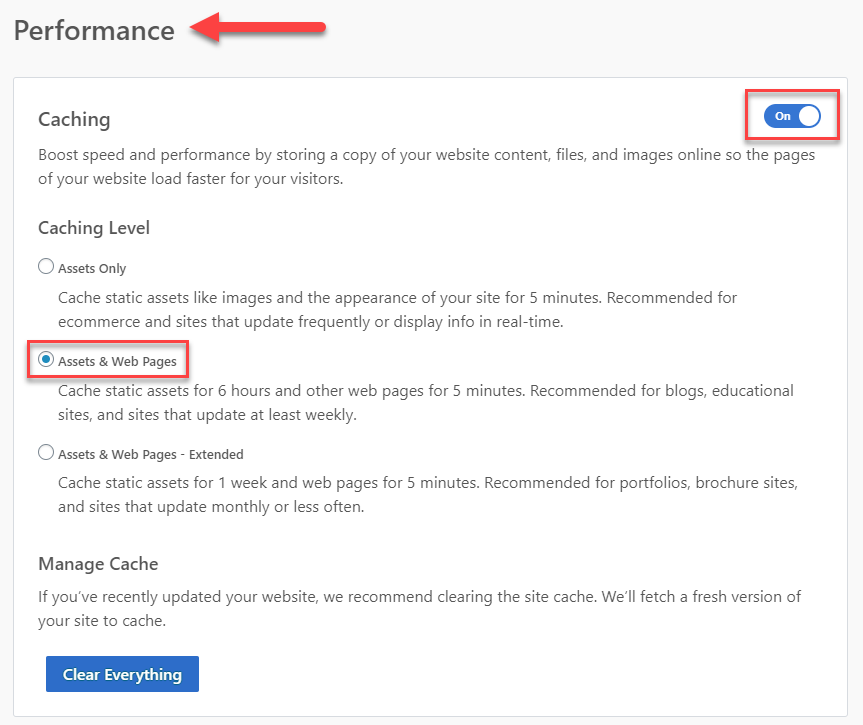
Note: You may also choose other options under Caching Level depending on the length of time you prefer your site to store cache (5 mins/6 hours/1 week).
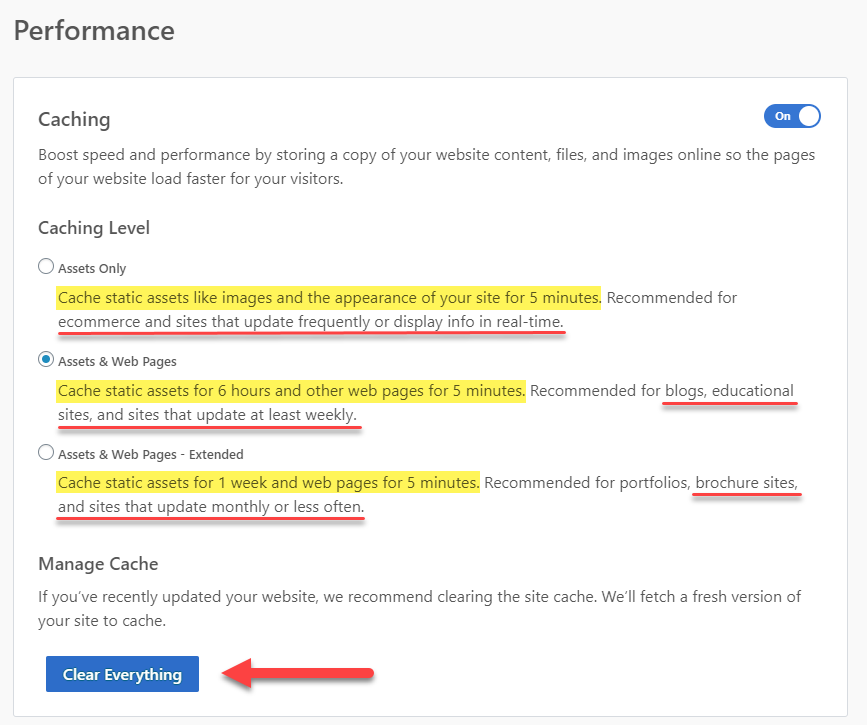
Note: You may also clear the cache under Manage Cache by clicking the Clear Everything button. Clearing cache enables you to see the updates or changes that you made on the back end of your website onto the live site a lot faster compared to the regular propagation time.
By Accessing 'My Sites' Inside Bluehost Portal:
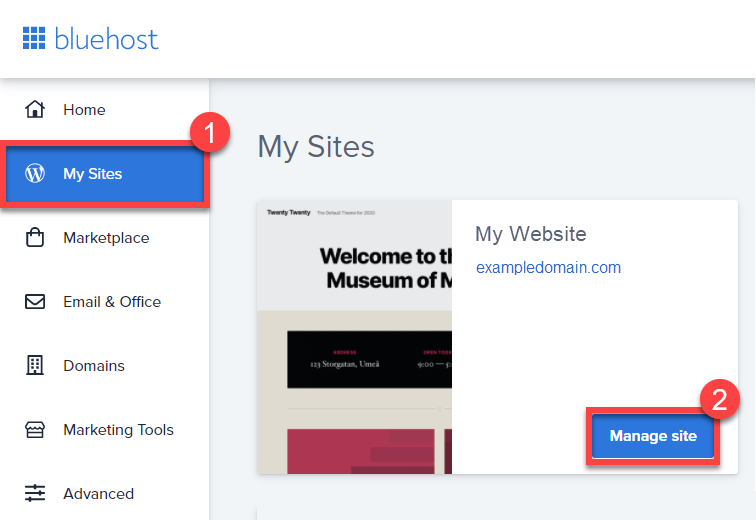
- Log in to your Bluehost account.
- Click My Sites on the left-side menu.
- Hover over the website in question.
- Click on the Manage site button.
- Hit on the Performance tab and look for Single-Server Caching Control.
- Under Cache Settings, by default, caching is already enabled as a Blog for both Assets & Web Pages. (If not, you will be able to see the blue circle above the word Off.
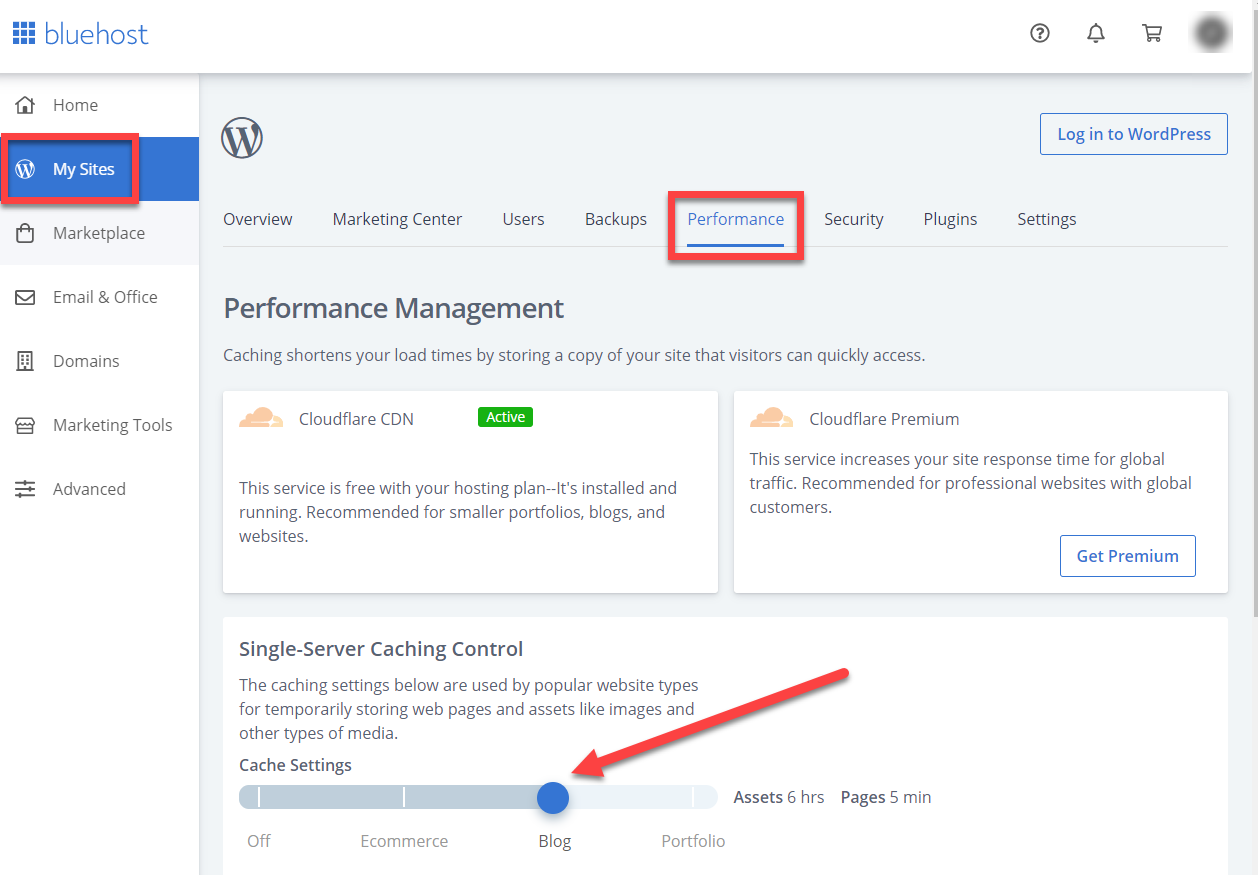
Note: You may also choose other options under Cache Settings depending on the length of time you prefer your site to store cache (5 mins/6 hours/1 week).

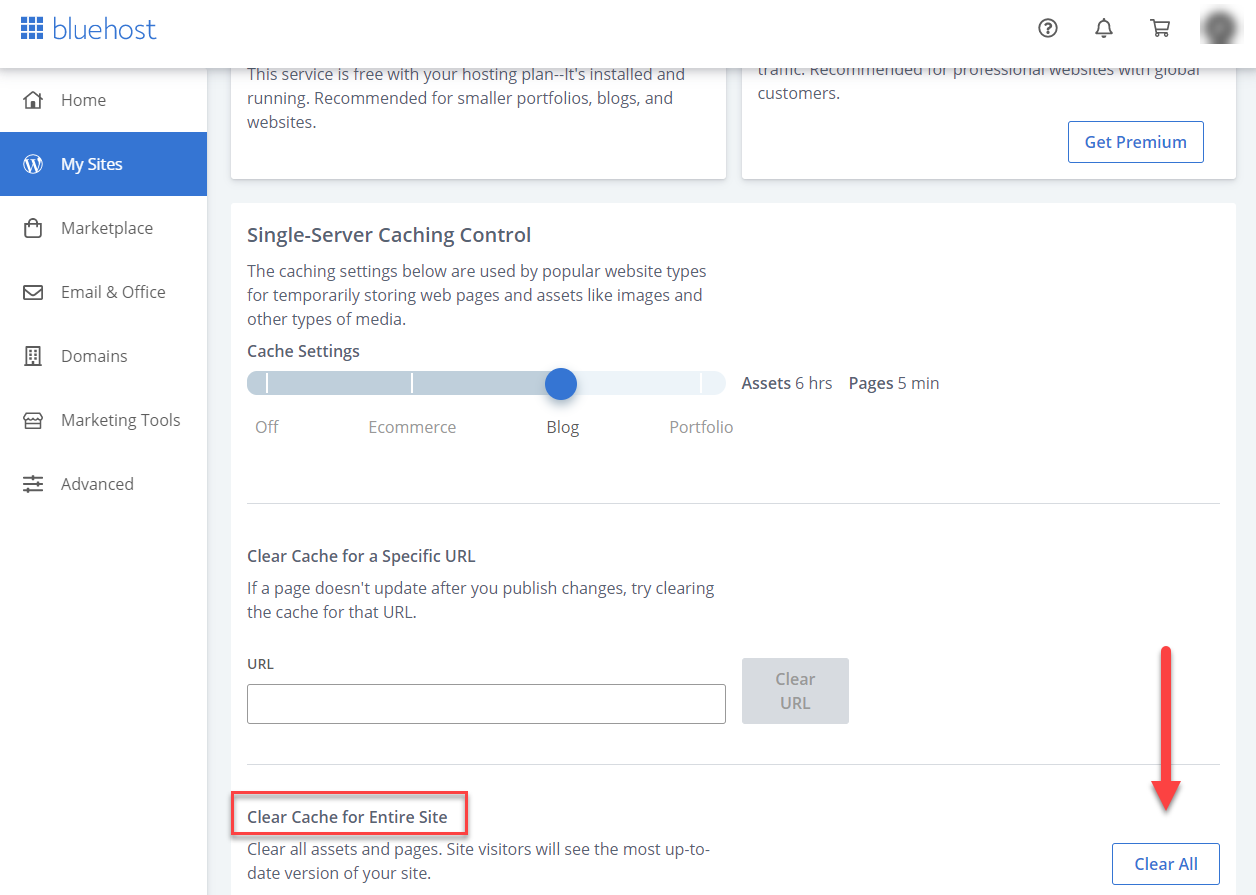
Note: You may also remove the cache under Clear Cache for Entire Site by clicking the Clear All button. Clearing cache enables you to see the updates or changes that you made on the back end of your website onto the live site a lot faster compared to the regular propagation time.
Additional Information:
How to Activate Bluehost Plugin
Want to use the Bluehost plugin? Follow the instructions below on how to install it:
- Log in to your Bluehost account.
- Click My Sites on the left-side menu.
- Hover over the website in question.
- Click on the Manage site button.
- Hit on the Settings tab and scroll down.
- Scroll down and look for Coming Soon Page, toggle the button to On.
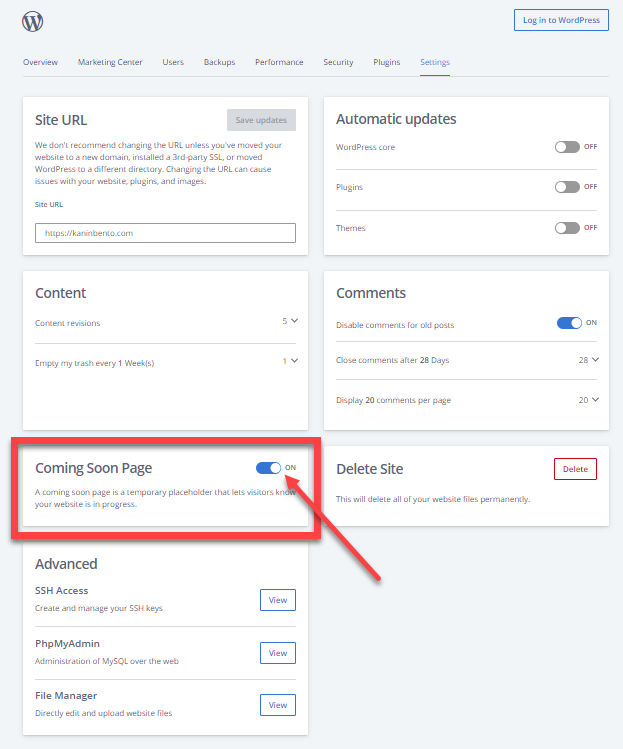
- A pop-up window will appear, stating This requires the Bluehost Plugin.
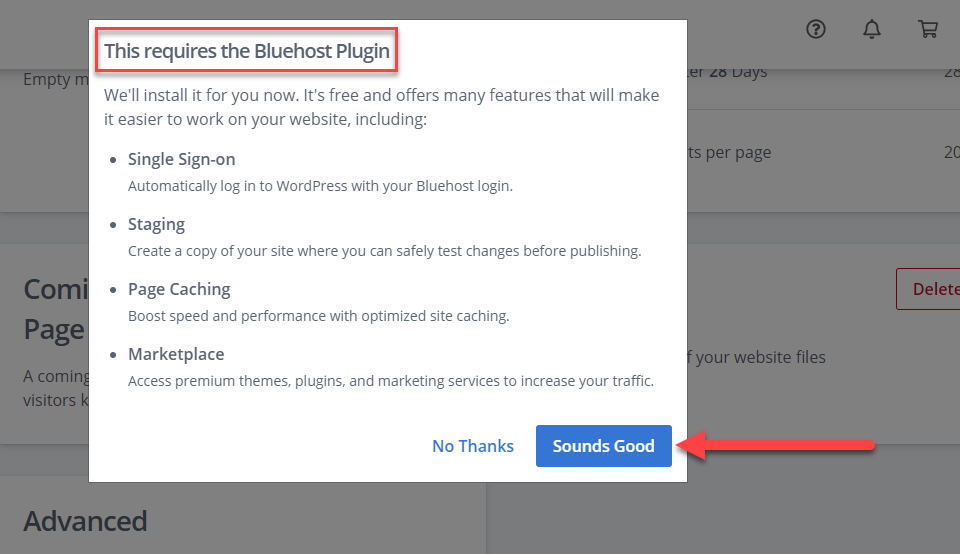
- Hit on the Sounds Good button, and that will automatically install the Bluehost plugin into your site. You will be able to access it once you login to your WordPress dashboard, located at the left-side menu.