
Understanding Email Error Messages
Overview
Each mail server has its distinct characteristics, including the way it handles error responses. Understanding these messages can sometimes be challenging. Therefore, we've compiled a comprehensive list of the most prevalent error messages and their possible variations. This resource will assist you in determining the appropriate actions to take. Please identify the error message that closely resembles the one you've encountered.
IP Address Has Changed
Whenever you access your webmail account, the system keeps track of your computer's IP address. If your IP address undergoes a change while you're logged in, webmail won't identify your new connection as valid and will log you out automatically. To resolve this issue, simply log in again to ensure your updated IP address is registered. However, if you encounter this error regularly, there are several additional steps you can take:
- If available, attempt to connect using an alternative internet source, such as mobile data or WiFi, and retry the login. If this resolves the problem, contact your internet service provider and ask for a static (permanent) IP address to avoid IP changes while using webmail.
- If obtaining a static IP isn't feasible, inquire if the DHCP lease time can be extended, allowing for longer login sessions.
- Are you experiencing the problem exclusively with your webmail client? Consider using a desktop email application like Outlook, Thunderbird, or Apple Mail. These applications don't rely on your IP address for authentication, making IP changes irrelevant.
Authentication Failed
An Authentication Failed error signifies that the email server cannot confirm the authorization of your email access. While this often results from an incorrectly entered password, it may also stem from an inaccurate username, connecting to the incorrect server, or being blacklisted. To address this problem, consider these steps:
- Reset your email password.
- Open your email application and review the following settings:
- Update the password to match the new case-sensitive password.
- Verify that your username is the complete email address, such as john@example.com.
- Ensure the server name is mail.example.com, where example.com corresponds to your domain.
- If your email application still doesn't function correctly, consider the following:
- If you've recently made changes to your domain points or upgraded or downgraded your hosting plan, please allow up to 72 hours for your new DNS settings to propagate globally.
- It's possible that your local IP address has been blacklisted. Wait for 24 hours and attempt to use webmail in the meantime. If the issue persists after 24 hours, investigate whether your local IP has been blacklisted.
- Your email application may be utilizing a locally blacklisted IP address, which can occur after numerous failed login attempts in a short time. If you suspect this is the case, try using an alternative internet connection, like mobile data or WiFi, and attempt to access your email again.
Tip: Please refer to the resource If Your Local IP Is Blacklisted for more information.
Certificate Name Mismatch
This error occurs when your email application receives a warning because the SSL certificate used by the server doesn't match the name your email application anticipated. Different forms of this error may include:
- Invalid Certificate
- Mail cannot verify the certificate for example.com
- The identity of mail.example.com cannot be verified
- The certificate for this server is invalid
- Hostname mismatch
- A secure connection cannot be established with the server
- The name on the security certificate is invalid or does not match the name of the site
- The server you are connected to is using a security certificate that cannot be verified
- This Connection is Untrusted. Confirm security exception
When your email application is configured with Private (with SSL) settings, and you use your domain name as the mail server (e.g., mail.example.com), it expects the SSL certificate to contain your domain name. However, the certificate may have the name of the Bluehost server (e.g., box123.BlueHost.com) instead. This mismatch triggers a warning in your email application, indicating that the name on the Bluehost server's certificate doesn't match your domain name. This is a normal occurrence.
Note: Email applications will still allow you to send and receive emails in this situation. However, you might need to adjust a setting within your email application to acknowledge this configuration. The steps for making this adjustment can vary slightly depending on your specific email application.
Tip: If you're uncertain about which setting to modify, you can consult our Email Application Setup Guides for reference.
550 Sender Verify Failed
This usually means the inbox you're sending to or from is full, or your mail routing setting in the zone editor is wrong.
-
Full mailbox: When an email account reaches or surpasses its storage limit, sending emails from it becomes problematic, leading to a Sender Verify Failed error. To check the mailbox quota of an email account, please follow these steps:
- Log in to your Bluehost Account Manager.
- Click the Professional Email tab located on the left side navigation bar.
- Choose the mailbox that has the error.
- If you have multiple mailboxes, click the MANAGE button on the email you want to manage.
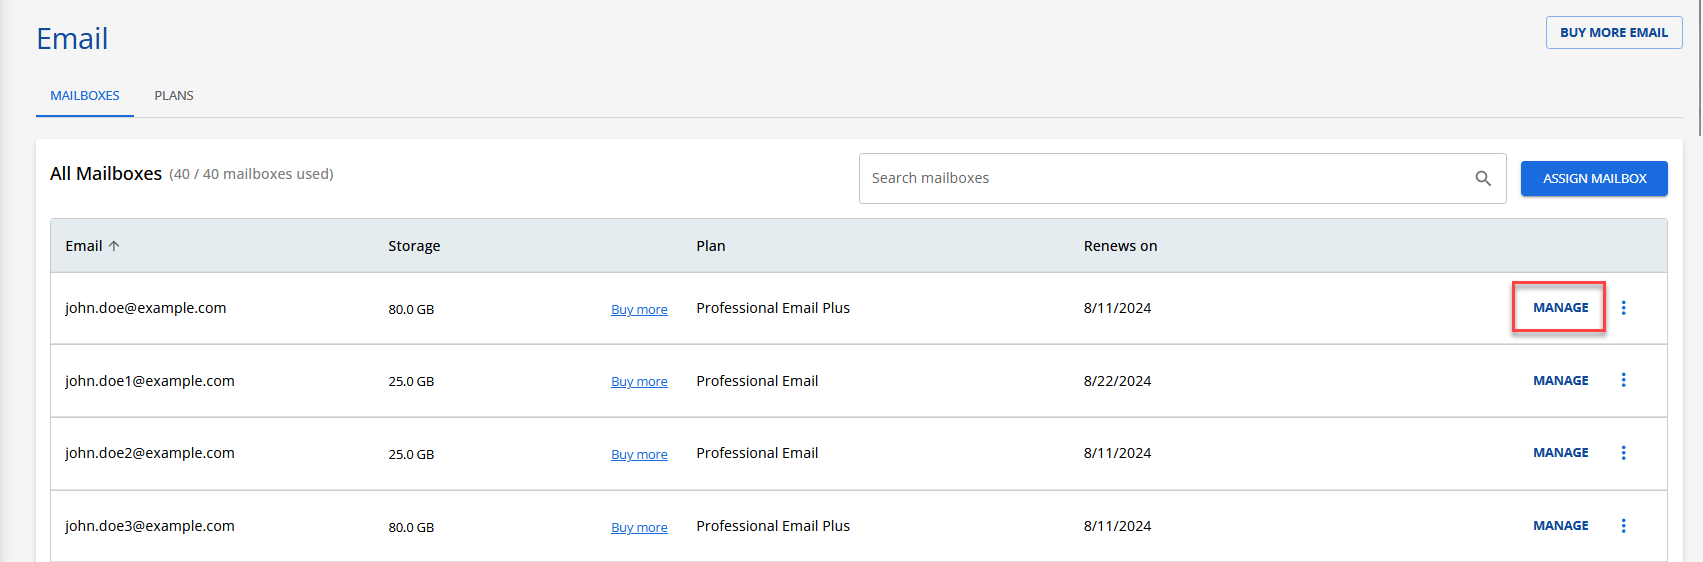
- If you only have a single email account, you will be rerouted directly to the Email Account Overview page.
- If you have multiple mailboxes, click the MANAGE button on the email you want to manage.
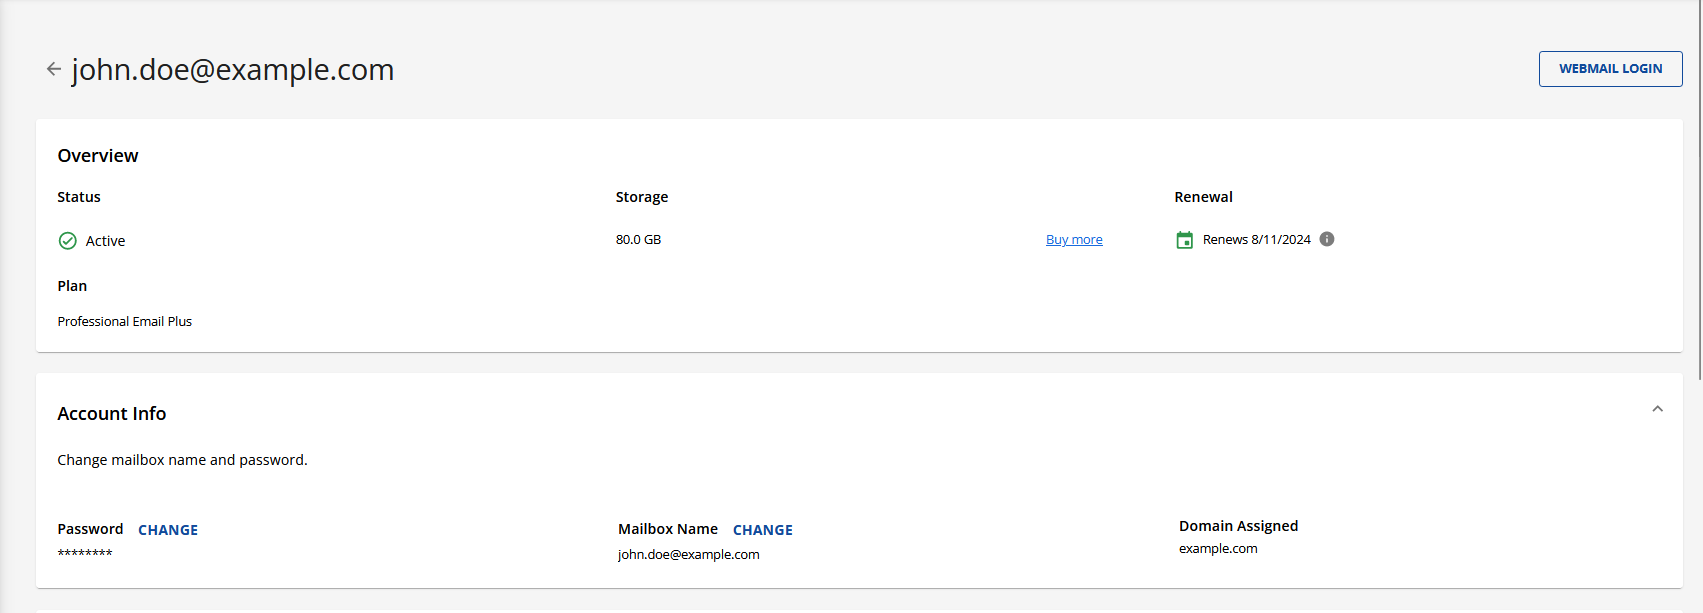
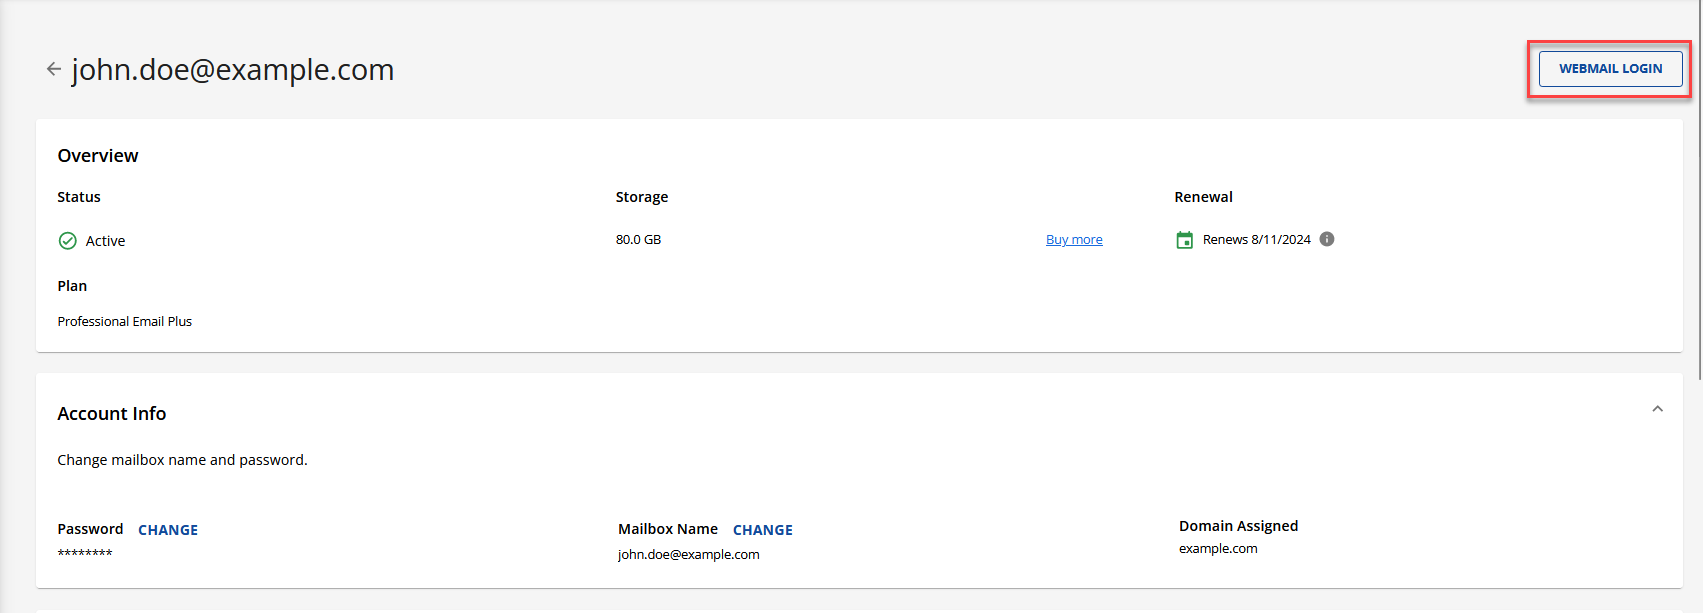
- Click the WEBMAIL LOGIN button to open the Cloud Mail login page in a new browser window.
- Log in to your email.
- On the login page, enter your complete mailbox name. For example, if your email is john.doe@example.com, type john.doe@example.com in the Email text field.
- Type in the password associated with your email address.
- Click the Sign in button.
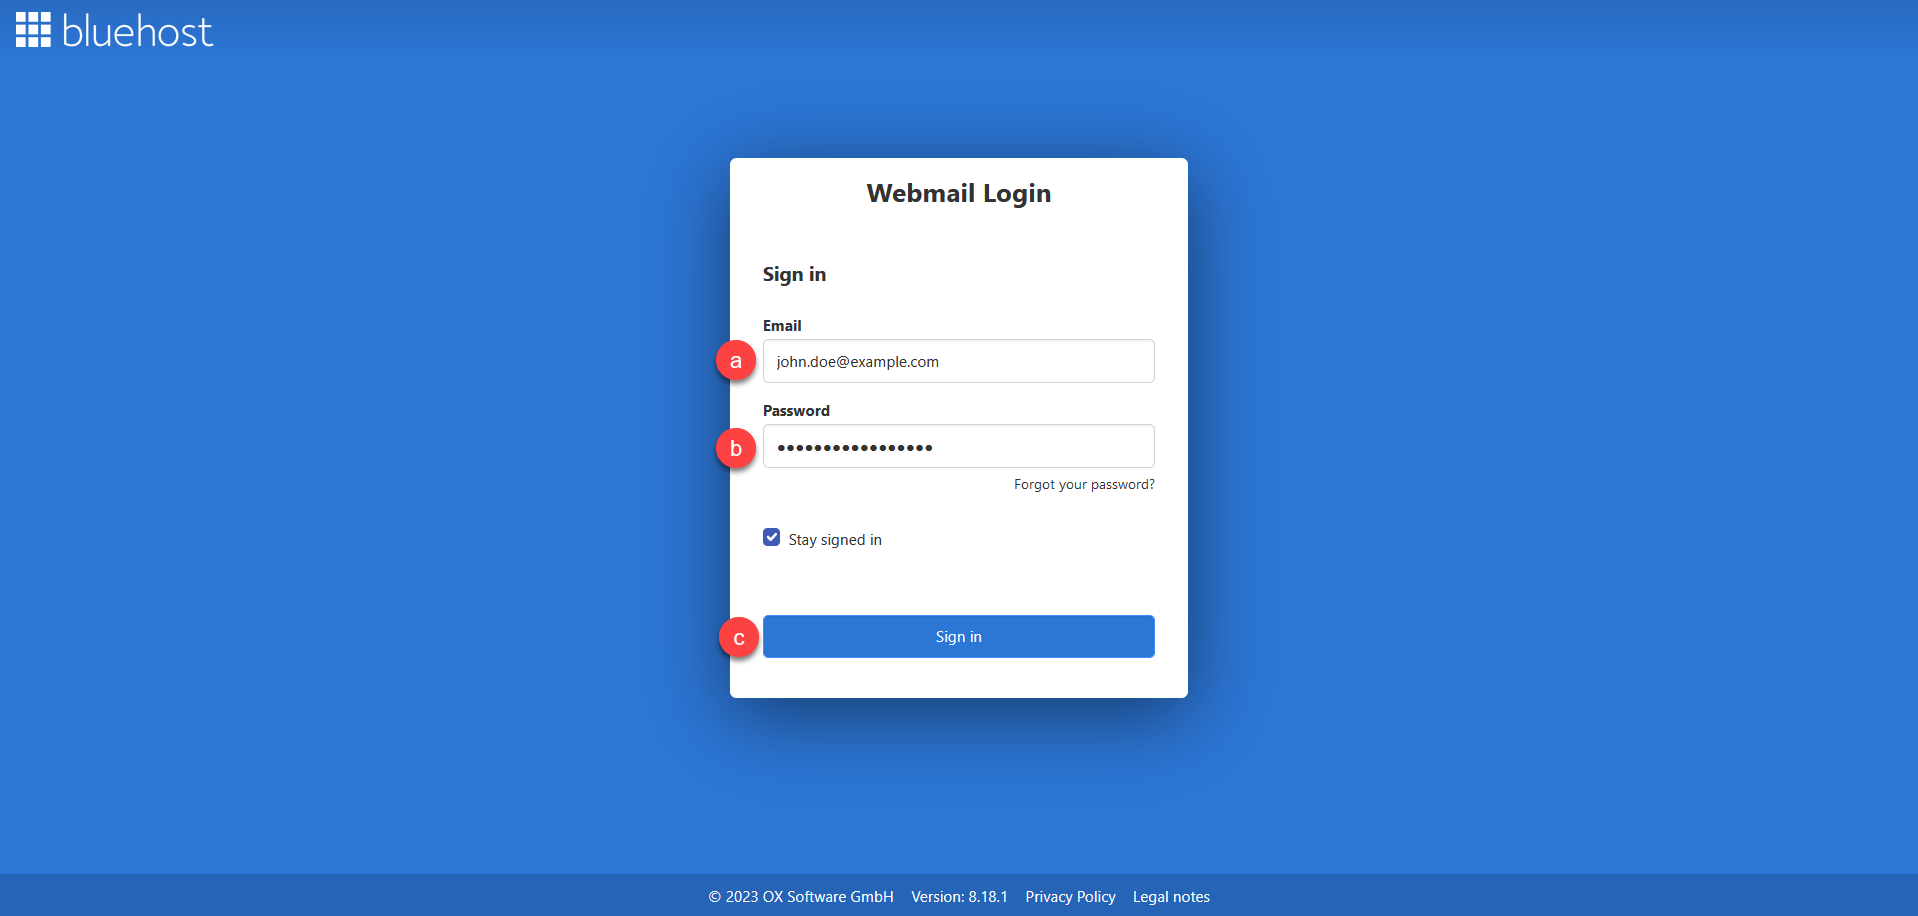
Tip: Enable the Stay signed in option by ticking the box to ensure your session remains active, preventing automatic logouts and the need to log in repeatedly.
- Check the Quota section located below the My Folders tab.
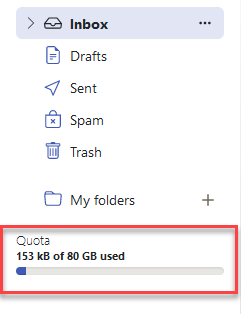
Note: If the account surpasses its quota, you can either increase the limit by upgrading or delete emails to free up space.
- Mail Routing: It's possible that the email routing configuration for your domain is incorrect.
Tip: Check out How to Modify MX Records: Email Routing for more information.
If you need further assistance, feel free to contact us via Chat or Phone:
- Chat Support - While on our website, you should see a CHAT bubble in the bottom right-hand corner of the page. Click anywhere on the bubble to begin a chat session.
- Phone Support -
- US: 888-401-4678
- International: +1 801-765-9400
You may also refer to our Knowledge Base articles to help answer common questions and guide you through various setup, configuration, and troubleshooting steps.