
SSH Access
Secure Shell (SSH) access has become an integral part of modern computing, allowing users to access and manage their systems with enhanced security remotely. In this article, we will walk you through how to enable and use SSH keys within your account.
- How to enable SSH from cPanel
- VPS and Dedicated Servers SSH Access
- How to use the SSH access
- Connecting to your server via Web Console for SSH
- Connecting to your server via SSH
- Windows
- Linux
- Mac
How to enable SSH/Shell from cPanel
To begin, you will need to log into your Bluehost cPanel account.
Note: Bluehost offers two account management interface options: our original 'Rock' control panel and 'Account Manager,' an updated control panel designed for simplicity. While management options are generally the same across interfaces, the location of certain settings may vary between the two. Please see Account Manager vs. Bluerock to determine which step to follow.
Account Manager
- Log in to your Bluehost control panel.
- Click on the Hosting tab in the side navigation menu on the left. Then, click cPanel.
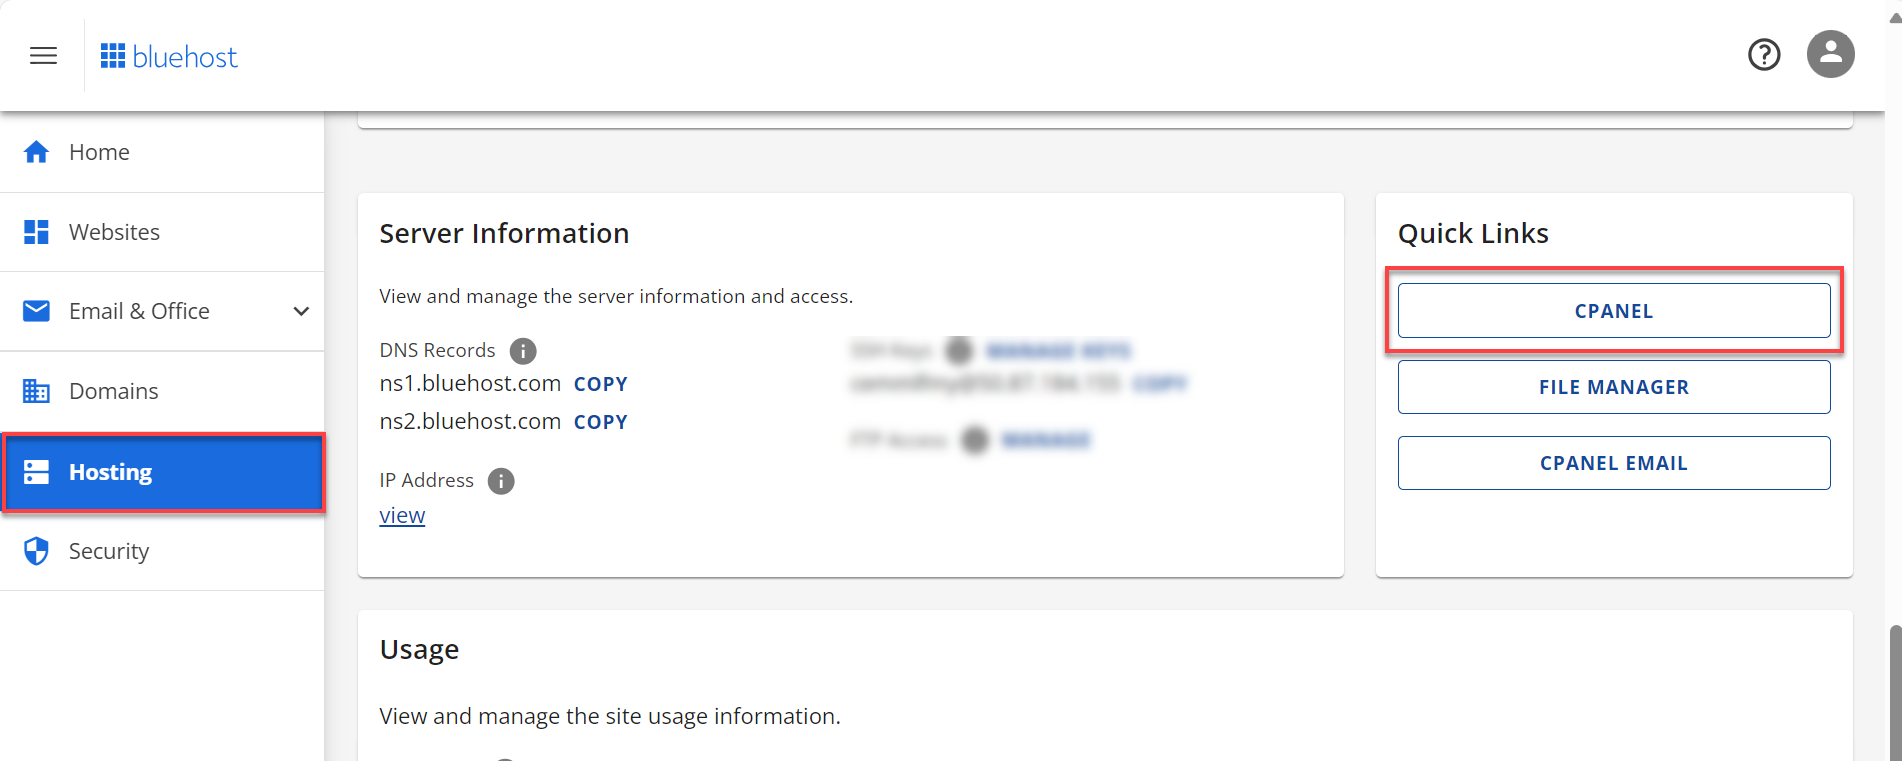
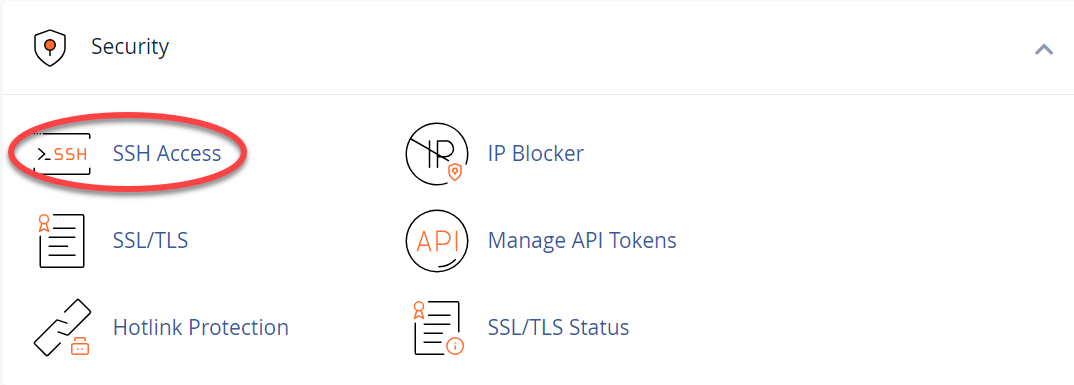
- Scroll down and locate the Security section, then click SSH Access.
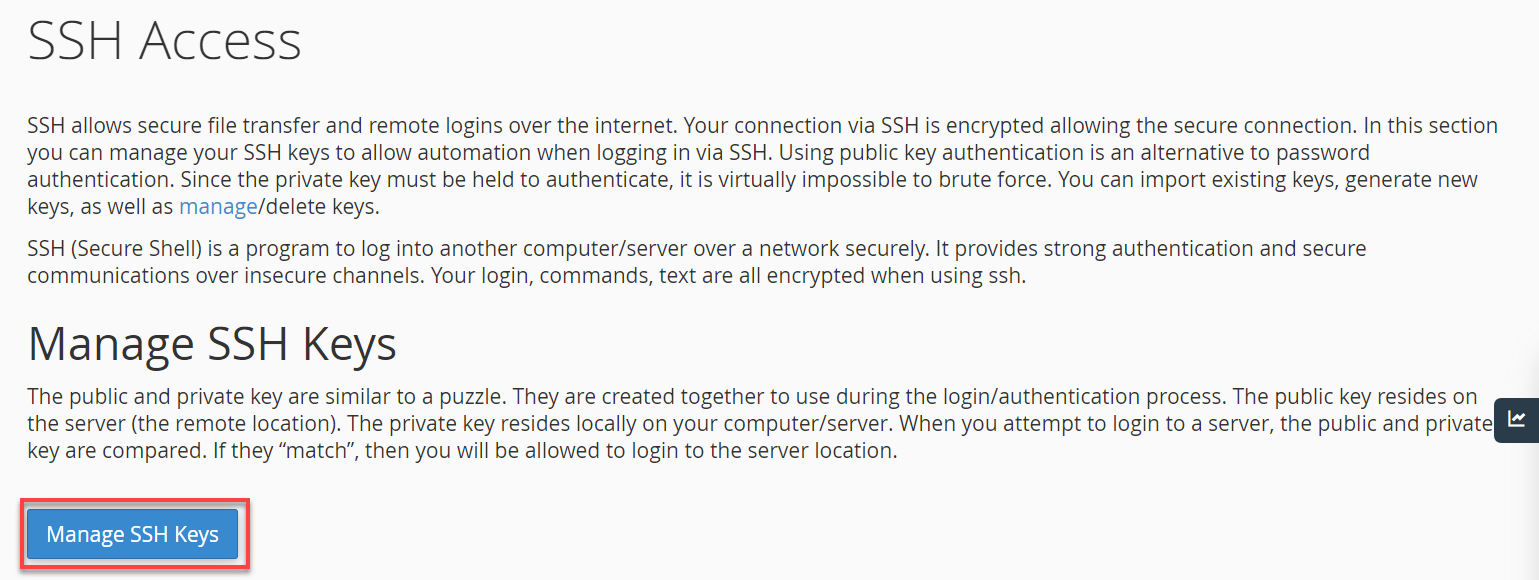
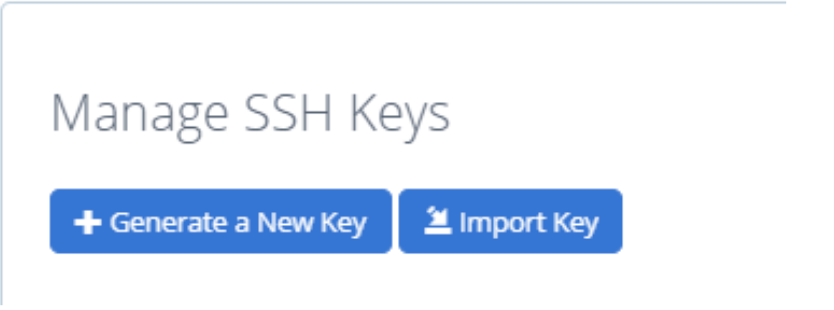
- Click Manage SSH Keys.
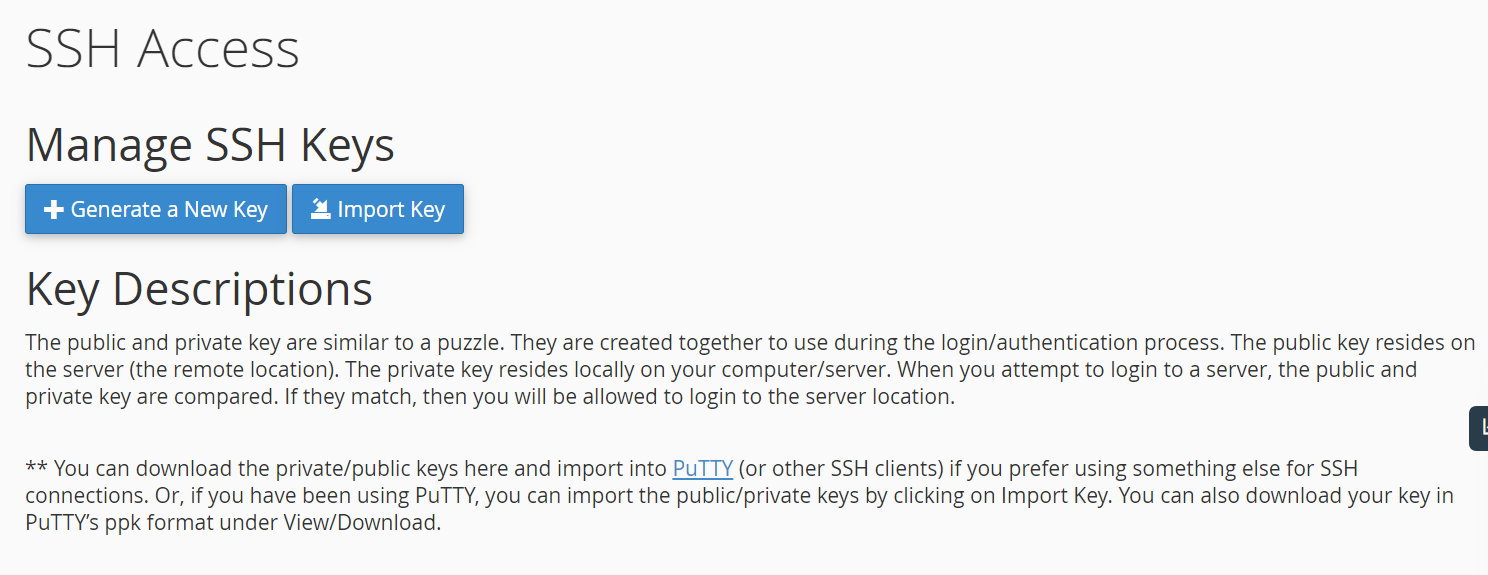
- Choose either Generate a New Key or Import Key.
Note: You can also use the Advanced Tab in your system settings to enable SSH for remote access to your device.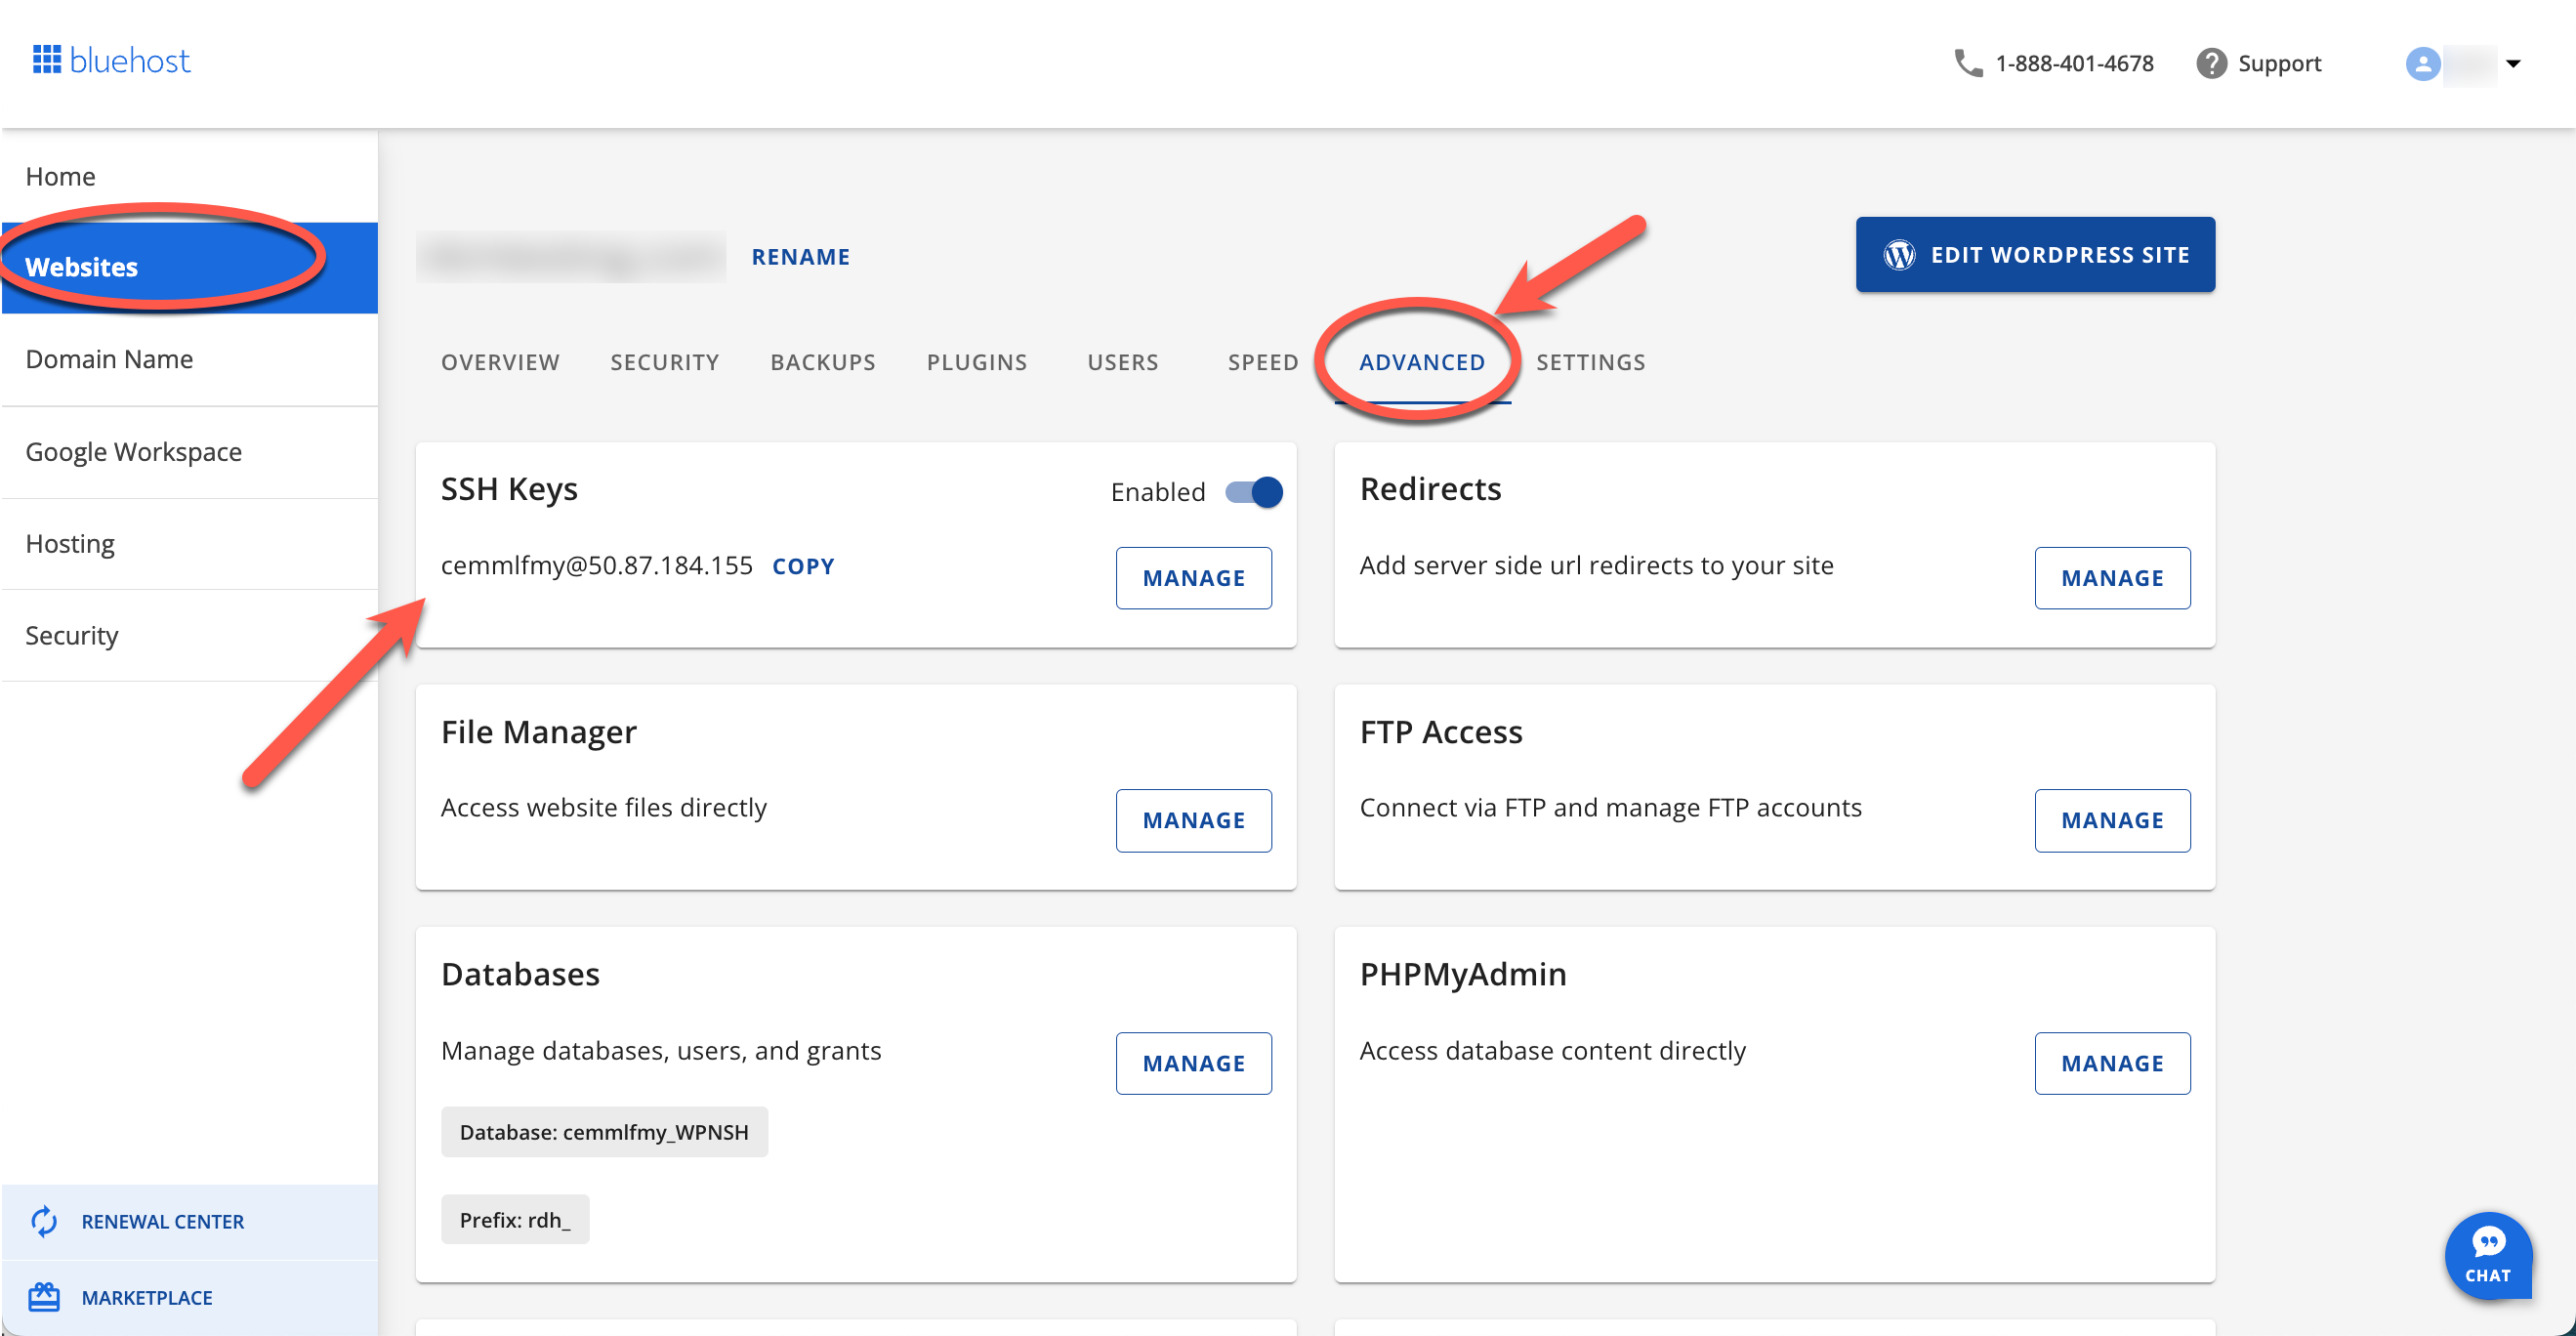
Bluerock
- Click the Advanced tab from the side navigation menu to the left.
- Click the SSH Access icon under the Security section.
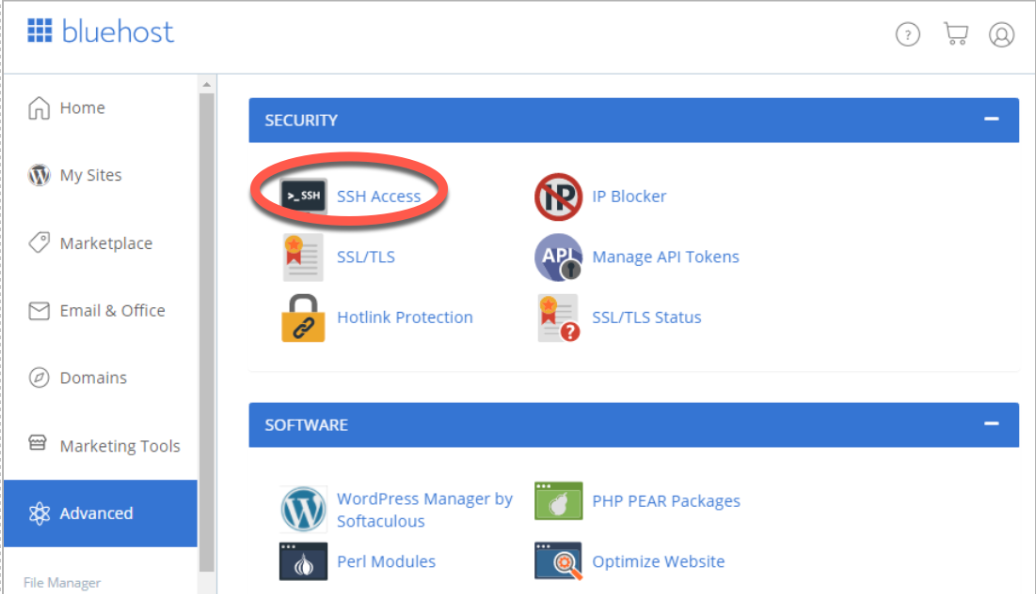
- Click the Manage SSH Keys button.
- Choose either the Generate a New Key or Import Key button.
- If you click the Generate a New Key, enter all the needed information, then click the Import option.
Tip: You don't have to import both keys. Importing a public OR private key is perfectly acceptable if that is all you need on the server. For additional information on using and running SSH commands, please see this article:SSH Connections and SSH Command.
Important Note: If you see the error "ERROR: Your account must be verified before shell access can be enabled. Please contact our Verification Department ( 888-401-4678 ) to verify your account before continuing." You will need to contact our Verification Team to verify your account purchase.
VPS and Dedicated Servers SSH Access
Dedicated and VPS customers automatically have root SSH access. Root shell allows you to change anyone and anything on your server.
If you want to activate SSH on a sub-account (separate cPanel), access WHM with your root login and click the Manage Shell Access link. There, you can enable normal and jailed shells for your clients; port 22 for a normal and jailed shell.
If you have multiple cPanels that need SSH, you can activate them all within root WHM.
Tip: For VPS/Dedicated Servers, we have two methods of accessing your server. Option 1. via Console and Option 2. via SSH using third-party Terminal Programs.
How to use the SSH access
Using the directions below, you would use port 22 to connect to the server via SSH and log in with username "root" and your WHM password. If you enable shell access for individual cPanels, the SSH username and password would be the same as the cPanel username and password for those accounts. Root SSH will allow you to access the server processes.
Root SSH will allow you to access the server processes.
Option 1. Connecting to your server via Web Console for SSH
We offer a Web Console for SSH terminal access, which simplifies the process by only requiring users to know the root username and server password.
Note: You can reach the web console for SSH by clicking on the system console button in the screenshot.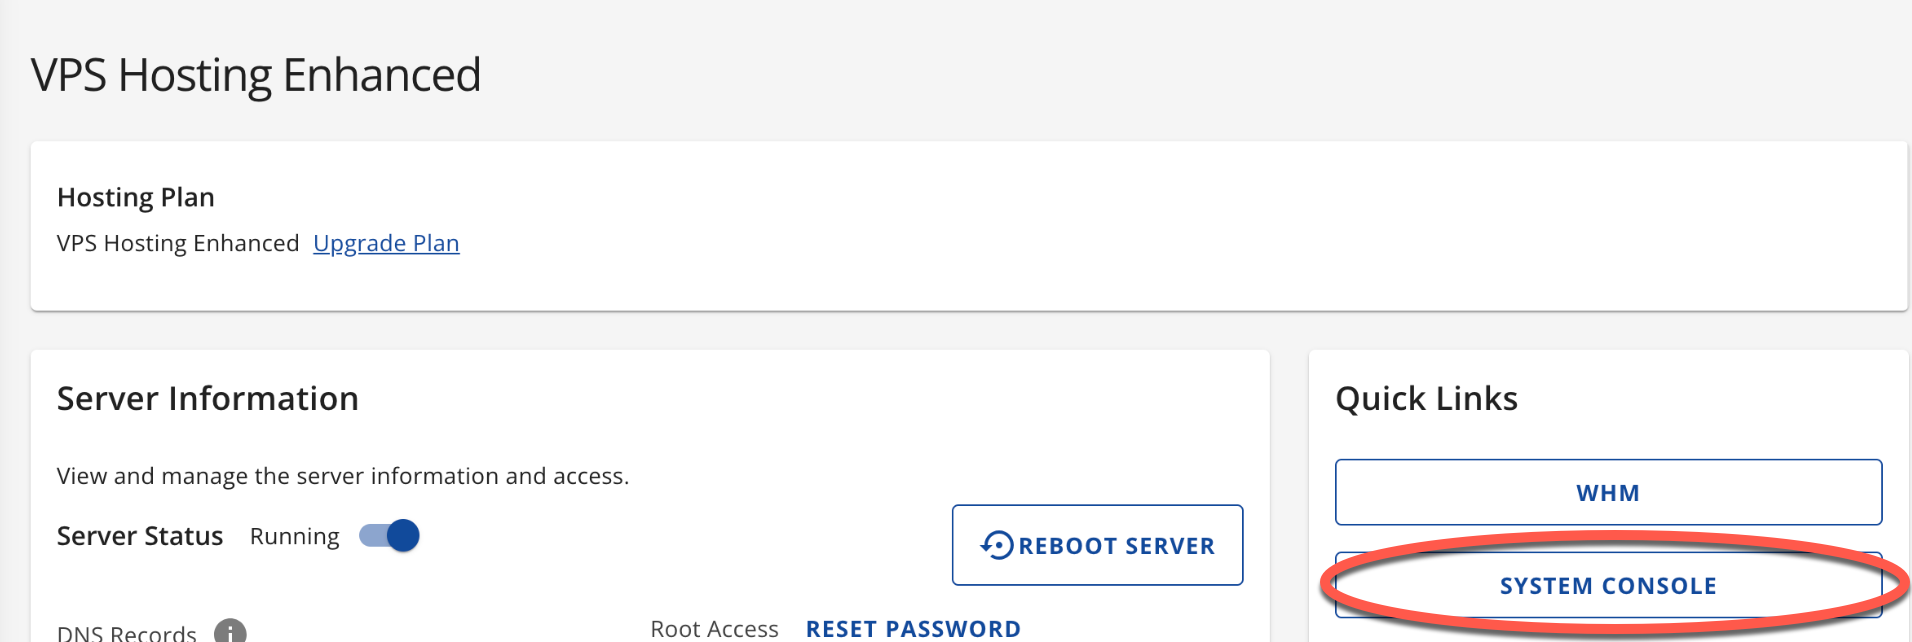
Option 2. Connecting to your server via SSH
See the sections for each hosting type above for specifics about which port and username to use.
Windows
To access SSH:
- Download WinSCP or PuTTY.
- Enter your IP address and the appropriate port number.
- Log in with your cPanel username and password.
Port 22 would be used for shared and reseller accounts; 22 is the default for dedicated & VPS. Dedicated or VPS can log in with the root WHM username and password.
Linux
To connect, run the following command from a terminal:
ssh -p 22 cpanelusr@ip.add.re.ss
Replace cpanelusr with your username and ip.add.re.ss with your IP address.
Port 22 would be used for shared and reseller accounts; 22 is the default for dedicated & VPS. Dedicated or VPS can log in with the root WHM username and password.
Mac
To open the terminal in Mac, go to Applications → Utilities → Terminal
Type in the following command:
ssh -p 2222 cpanelusr@ip.add.re.ss
Replace cpanelusr with your username and ip.add.re.ss with your IP address.
Port 22 would be used for shared and reseller accounts; 22 is the default for dedicated &VPS. Dedicated or VPS can log in with the root WHM username and password.
If you need further assistance, feel free to contact us via Chat or Phone:
- Chat Support - While on our website, you should see a CHAT bubble in the bottom right-hand corner of the page. Click anywhere on the bubble to begin a chat session.
- Phone Support -
- US: 888-401-4678
- International: +1 801-765-9400
You may also refer to our Knowledge Base articles to help answer common questions and guide you through various setup, configuration, and troubleshooting steps.