
Fixing WordPress HTTP 500, Critical Errors, and White Screen of Death
When managing a WordPress website, encountering challenges like HTTP 500 errors, critical errors, and the white screen of death can be intimidating. In this article, we will delve into the complexities of troubleshooting websites afflicted by these errors, whether the 500 error or the 'White Screen of Death' (also known as WSOD) leading to a blank screen. You can expect to gain valuable insights on resolving these issues and restoring your website's functionality.
Important: It is highly advisable to create a backup of the database before making any modifications to the existing website.
- Lowering the PHP version
- Troubleshooting Themes and Plugins
- Check WordPress Core Files
- Troubleshooting the .htaccess
- Troubleshooting Index Files
Lowering the PHP version
Note: We prioritize upgrading our customers to newer PHP versions to enhance security and usability. However, it's important to note that PHP versions older than 7.3 will no longer receive support from Apache, the essential web server service. To maintain compatibility and receive ongoing support, we highly recommend updating your site to run on PHP 7.3 or a higher version as much as possible.
Account Manager
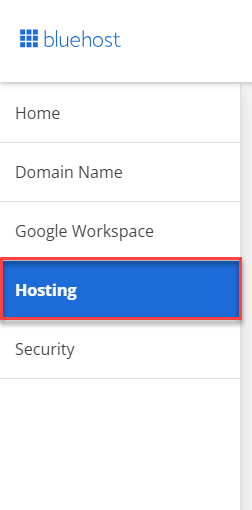
- Log in to your Bluehost control panel.
- Click the Hosting tab from the side navigation.
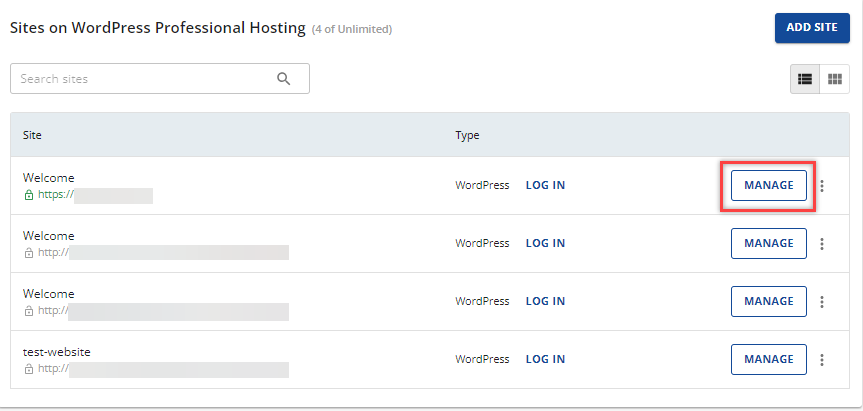
- Select the website that you need to troubleshoot under the Site tab, then click Manage.
- Next, navigate through the menu and click on Settings.
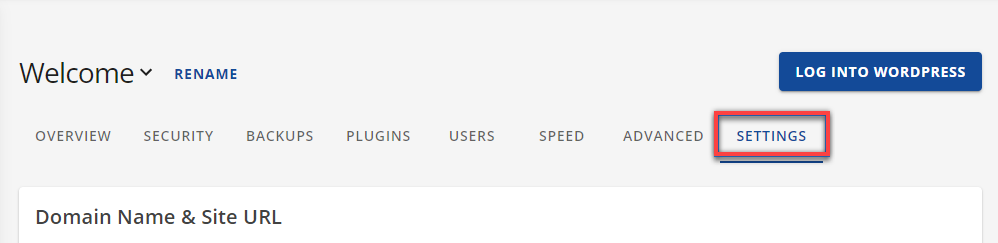
- Once you're in Settings, scroll down and locate the PHP Version, and click Change.
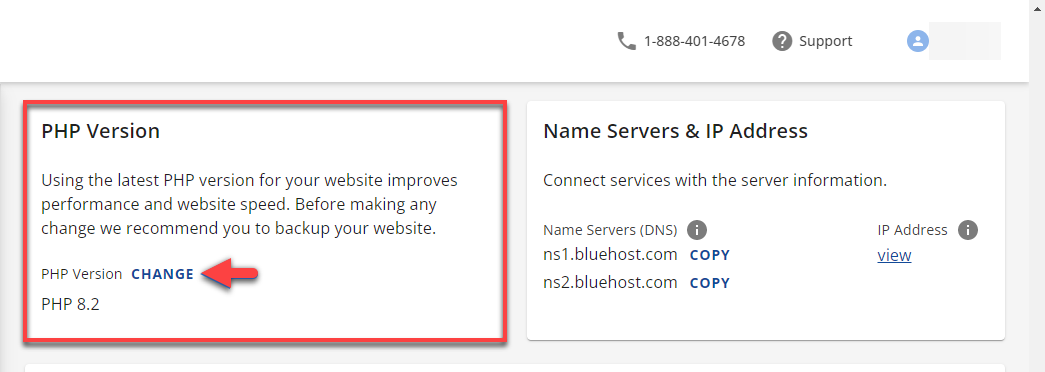
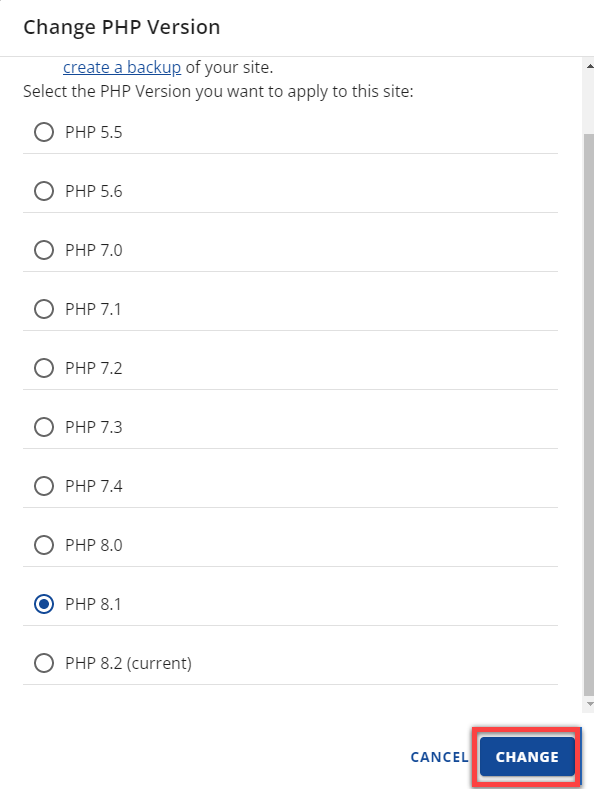
- Choose a lower PHP version from your current PHP version and click on Change.
Bluerock
- Log in to your Bluehost control panel.
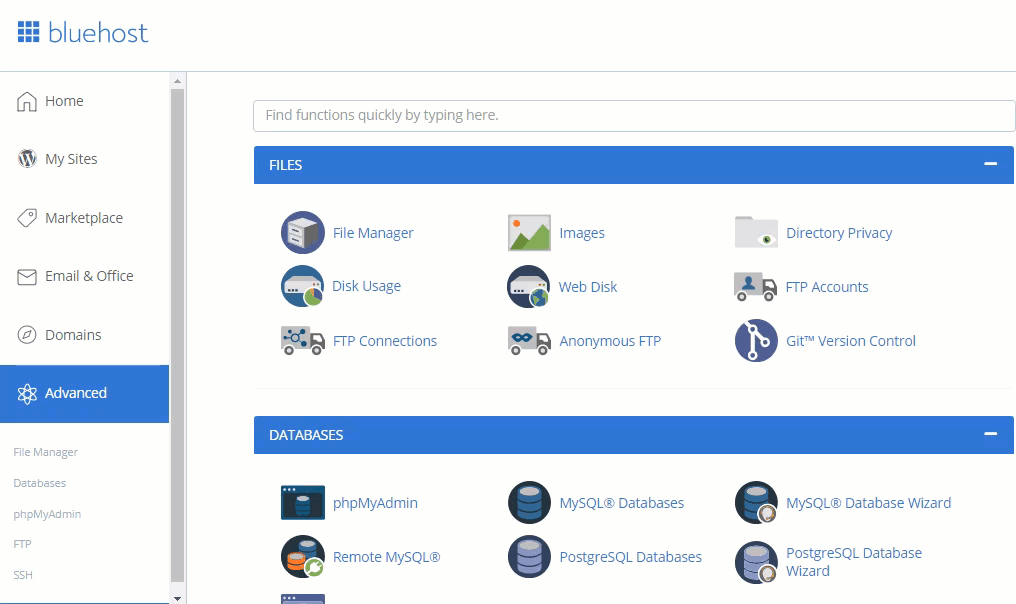
- Click on the Advanced tab from the side navigation menu to the left.
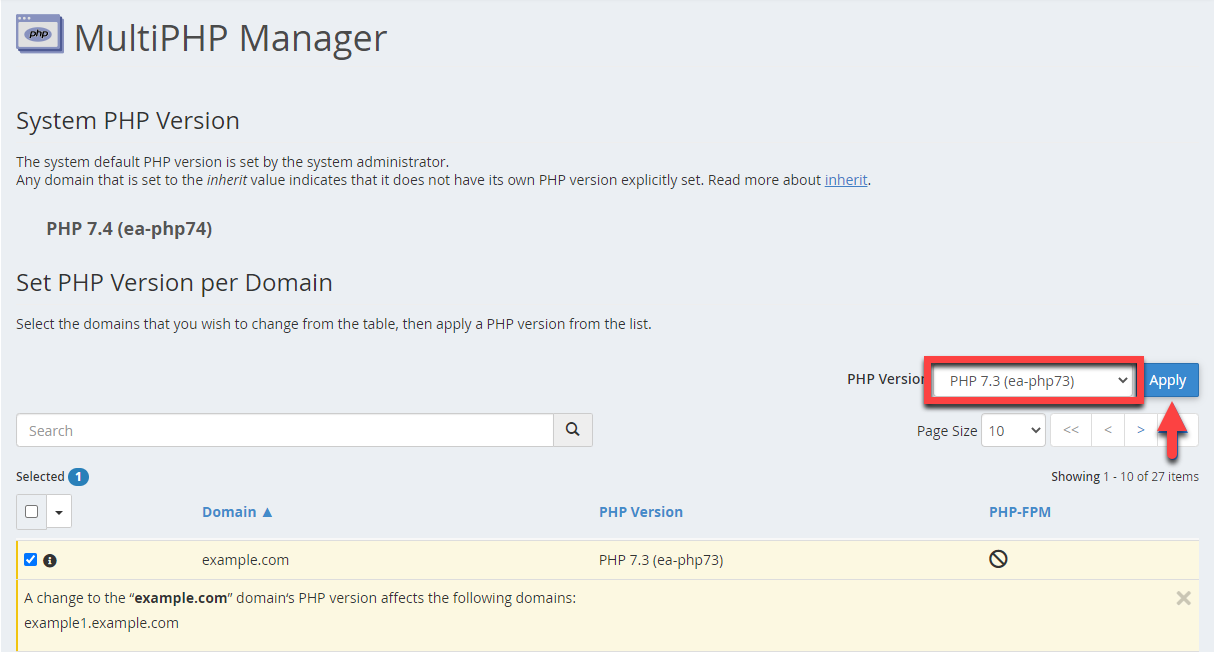
- In the Software section, click MultiPHP Manager.
- Select the checkbox beside the website(s) that you want to apply this PHP version.
- Choose the lower PHP Version, then click Apply.
Note: If downgrading PHP resolves your website issues, we suggest contacting your theme developer to discuss obtaining an updated theme that works seamlessly with the latest PHP version. This proactive step helps prevent potential compatibility problems that could lead to website downtime.
Important: Please be aware that reverting to an older PHP version is a short-term fix and not recommended as a long-term solution. Older PHP versions may lose support as technology advances and software updates are released. It is best for you to update your PHP version regularly to leverage the latest features, performance enhancements, and security patches. By staying up to date, you ensure your website's long-term stability and functionality.
Troubleshooting Themes and Plugins
We want to emphasize the importance of caution when you change your theme without creating a backup beforehand. This precautionary step is crucial to avoid any potential permanent data loss or damage to your website.
If you need any help with your current theme, we highly recommend contacting a professional WordPress developer for expert assistance. Alternatively, consider exploring alternative themes as a viable solution. Your website's safety and functionality are our top priorities, and we encourage you to make informed decisions to protect your online presence.
Note: For a detailed step-by-step guide, please visit our article WordPress - Broken Plugin or Theme.
Check WordPress Core Files
Account Manager
- Under Hosting, select the site you need to troubleshoot, navigate to the Security tab and locate the option to Scan Core Files. Click on it to initiate the scanning process.
- Once the scanning process is complete, you will receive a notification. If no errors are detected, you will see the following message displayed below:

Bluerock
- To begin, you must be logged in to your Bluehost Control Panel. And then access the WordPress tool.
- Click on the My Sites tab from the side navigation menu to the left.
- Locate the site you want to back up or restore and click the Manage Site button.
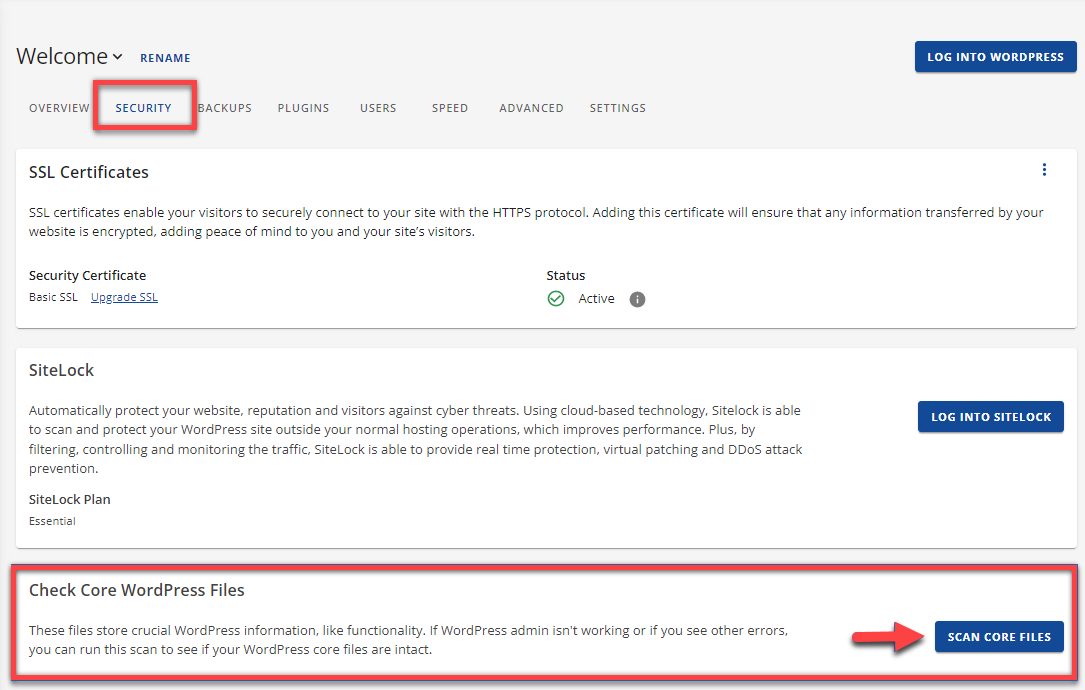
- Click the Security tab. From there, click Scan Now to scan your core WordPress files in the Check core WordPress files tiles. You will receive a notification depending on the scan result.
a. File Issue: Your core files have been modified.
b. All Good: Your core files are excellent and intact.
- If you received the File Issue confirmation, click the Repair files to resolve the problem.
- You will receive a confirmation once the repair is complete.
Troubleshooting the .htaccess
Accessing File Manager
Account Manager
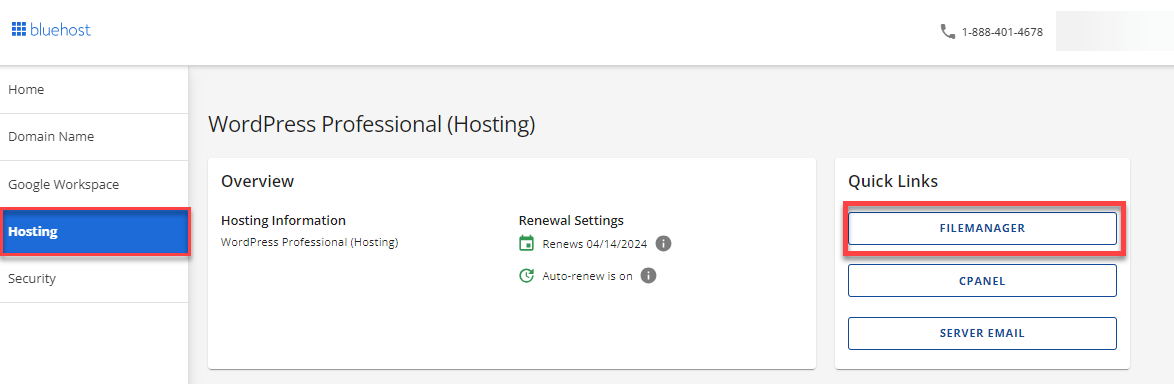
- Navigate to the Hosting tab and select the desired site. Under the Overview section, scroll down slightly and locate the Quick Links tile. From there, click on File Manager to access the file management functionality.
Bluerock
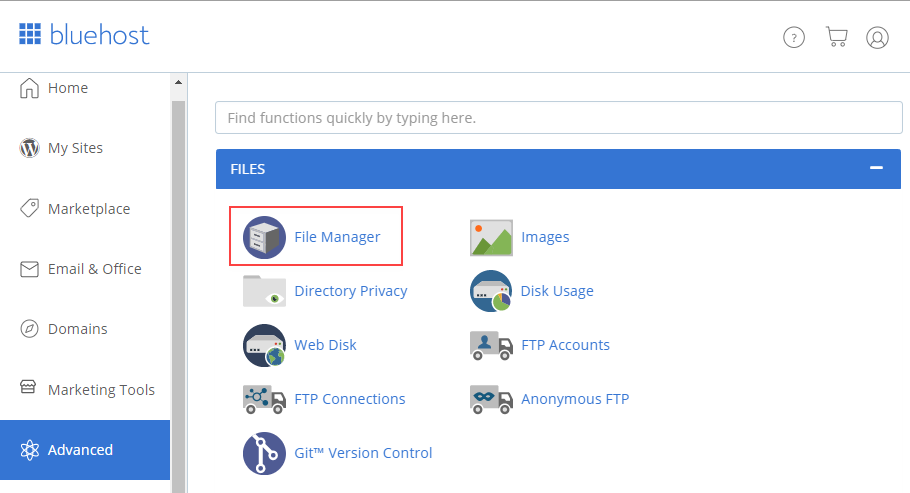
- To access the file manager, navigate to the left-hand side menu and click on the Advanced tab. Locate the Files tile and click on the icon for File Manager.
After accessing the file manager, you can proceed with the steps below to locate your .htaccess file, rename it, create a new one, and save it with the provided code.
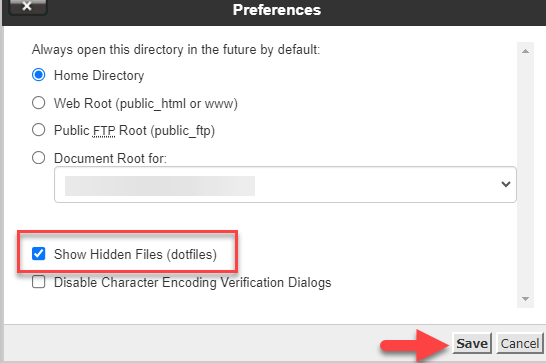
- In the File Manager, navigate to the far-right side and click on Settings.
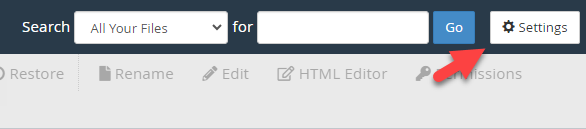
- Check the checkbox that says, "Show Hidden Files (dotfiles)," and then click on the Save button.
- Once you have saved the settings, navigate to the folder that corresponds to the domain you are currently working on. This folder will most likely be located within the public_html directory, especially if you are working on your primary domain. However, if you are working on a different domain, search for the specific folder associated with your website.
- The next step is to find the .htaccess file within your site's folder. Simply highlight the .htaccess file, right-click, and select the Rename option.
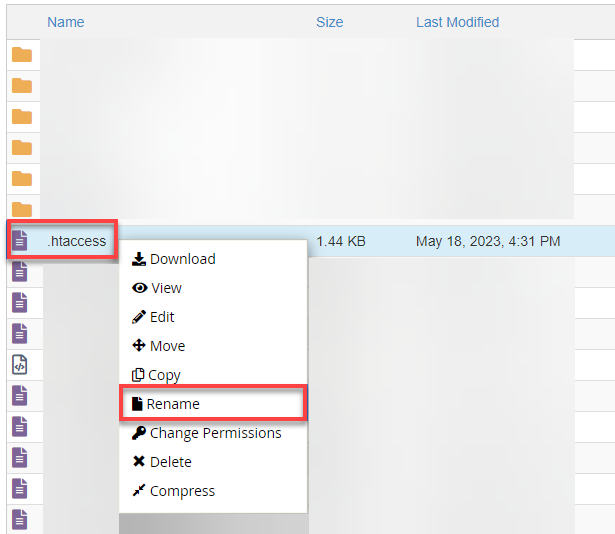
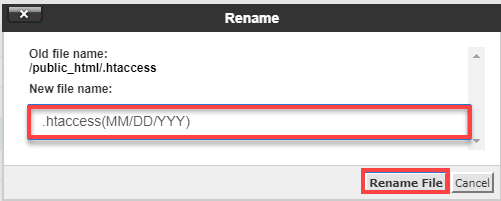
- Once located, disable the current .htaccess file by renaming it to .htaccess(current date).
- After you have successfully renamed the old .htaccess file, it's time to create a new one. To do this, click on the File option in the upper left-hand corner of the file manager interface.
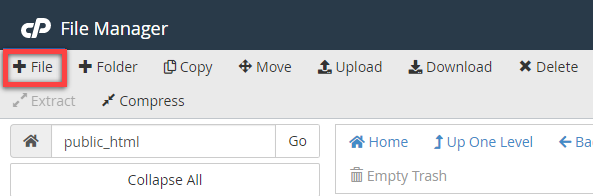
- In the New File Name field, enter ".htaccess" and then click on the Create New File button to proceed.

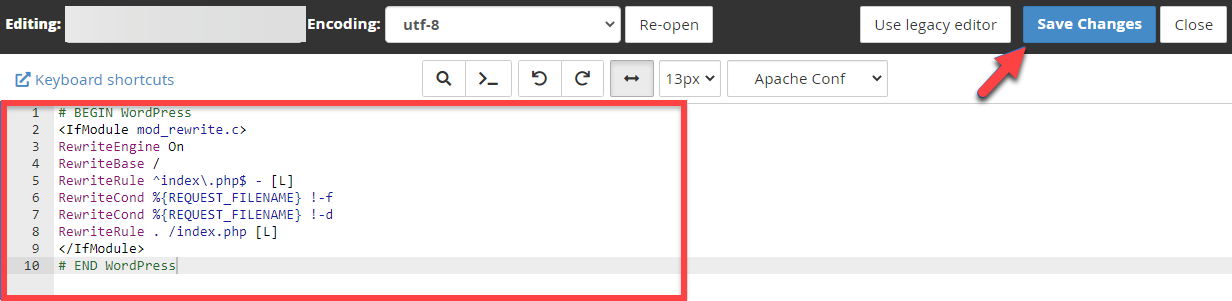
- Now, select the newly created .htaccess file, right-click, and choose the Edit option.
- Add the following code:
# BEGIN WordPress

RewriteEngine On
RewriteBase /
RewriteRule ^index\.php$ - [L]
RewriteCond %{REQUEST_FILENAME} !-f
RewriteCond %{REQUEST_FILENAME} !-d
RewriteRule . /index.php [L]

# END WordPress
Ensure you save the changes you made in the code editor by clicking the Save Changes button.
If the error is related to the .htaccess file, a potential solution is to replace it with a default .htaccess file. This action often resolves the issue and brings your website back online. However, if your website remains inaccessible after replacing the .htaccess file, the next step is to delete the file you created and revert to the original .htaccess file. By renaming the original file back to ".htaccess," you can troubleshoot and address any persisting issues.
Troubleshooting Index Files
If the default file (index.html, index.php, default.html) is empty, it can result in the White Screen of Death (WSOD) appearing on your website. It is crucial to inspect the directory index and take note of the file size to troubleshoot this issue effectively.
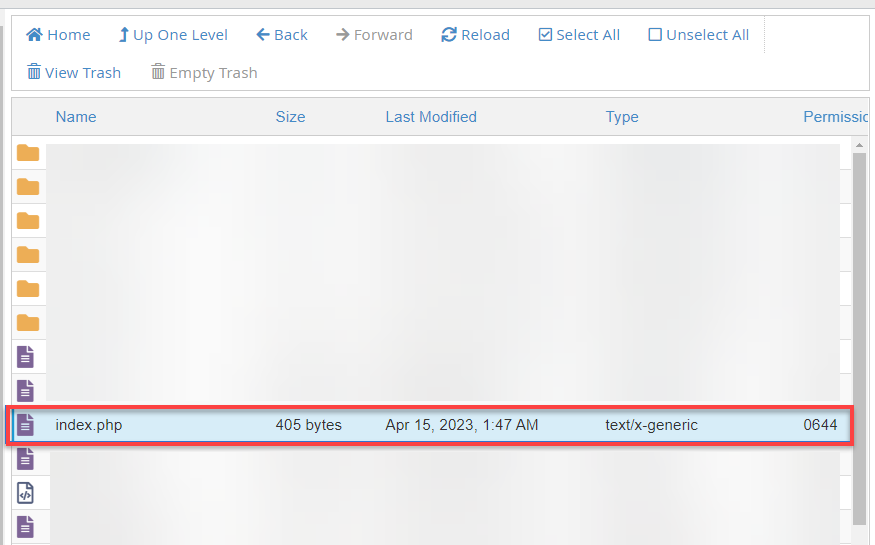
- Access the file manager. If you are unsure about how to do this, you can refer to the section on Accessing File Manager for detailed instructions.
- Choose the folder that corresponds to the domain you are currently working on.
- Look for any additional index files besides index.php.
- If you come across any additional index files, it is recommended to temporarily rename them to prevent them from being recognized as index files. To do this, select the file and right-click on it, then choose the option to rename.
- Check if the issue is resolved and the website is restored.
- If the issue is resolved, head and move the duplicate index file(s) to a different location void any conflicts.
These troubleshooting steps for addressing issues related to the Theme, Plugins, .htaccess, and core files should help resolve HTTP 500, Critical Errors, and White Screen of Death problems. However, if the issues persist even after performing these troubleshooting steps, other underlying reasons may need to be investigated further.
If you need further assistance, feel free to contact us via Chat or Phone:
- Chat Support - While on our website, you should see a CHAT bubble in the bottom right-hand corner of the page. Click anywhere on the bubble to begin a chat session.
- Phone Support -
- US: 888-401-4678
- International: +1 801-765-9400
You may also refer to our Knowledge Base articles to help answer common questions and guide you through various setup, configuration, and troubleshooting steps.